Setting Up Metasploitable 2 and Nessus for Vulnerability Scanning
A step-by-step guide to installing Metasploitable 2 and Nessus on VirtualBox, setting up a host-only lab network, and running your first vulnerability scan.
Overview
This post documents how I set up a small vulnerability scanning lab from scratch using VirtualBox. The lab consists of two machines — Kali Linuxand Metasploitable 2— all networked together on a Host-Only adapter, with Nessus Essentials installed on Kali to scan for vulnerabilities.
The lab tasks covered:
- Installing Metasploitable 2 on VirtualBox
- Installing Nessus on Kali Linux (terminal-based)
- Running vulnerability scans against Metasploitable 2
- Generating a detailed vulnerability report
Part 1: Installing Metasploitable 2 on VirtualBox
Metasploitable 2 is an intentionally vulnerable Linux machine maintained by Rapid7, designed as a safe target for practicing vulnerability scanning and exploitation.
Step 1: Download and Extract
Visit https://www.rapid7.com/products/metasploit/metasploitable/ to download the Metasploitable 2 zip file (825 MB). Extract it to your preferred location — it contains a .vmdk disk image.
Steps 2–3: Create the VM in VirtualBox
Open VirtualBox, click New, and configure the VM as follows:
- VM Name: Metasploitable 2
- OS: Linux
- ISO Image: Not selected (we’ll attach the disk manually)
 New Virtual Machine wizard — name and OS selection
Step 4: Configure Virtual Hardware
Under Specify virtual hardware, use the recommended settings. 4 GB RAM and 2 CPUs are sufficient for Metasploitable 2.
 Recommended hardware: 4096 MB RAM, 2 CPUs
Step 5: Attach the Metasploitable Disk
Click Finish, then open the VM Settings. Navigate to Storage → Controller: SATA, click the disk icon under Attributes, select Choose a Disk File, and browse to the extracted .vmdk file from the Metasploitable archive.
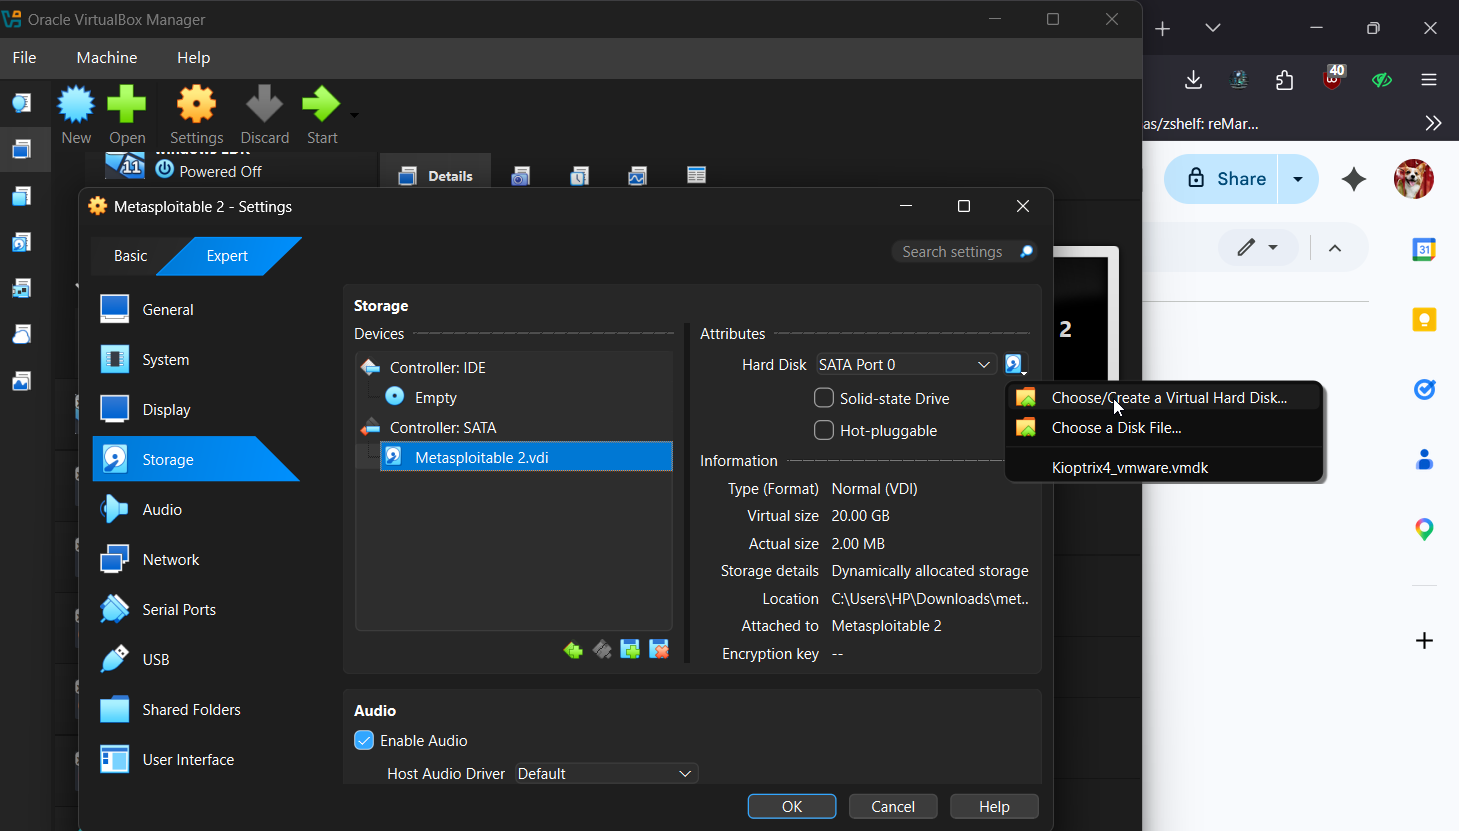 Attaching the Metasploitable 2 .vdi disk under Controller: SATA
Step 6: Set Network to Host-Only Adapter
Under Network, set Adapter 1 to Host-only Adapter. This keeps Metasploitable isolated — it should never be exposed to an untrusted network.
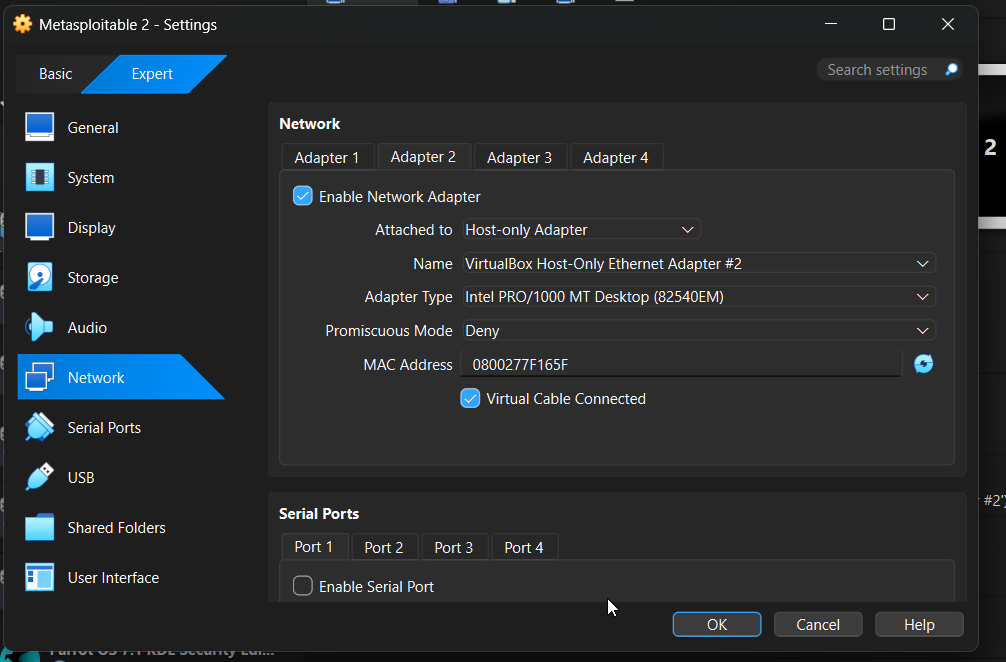 Network configured as Host-Only Adapter — isolated from the internet
Steps 7–8: First Boot — Entering Recovery Mode
Click OK then Start. On boot, press ESC when prompted to access the GRUB boot menu. Use the arrow keys to select the second option — Ubuntu 8.04, kernel 2.6.24-16-server (recovery mode) — then press e to edit it.
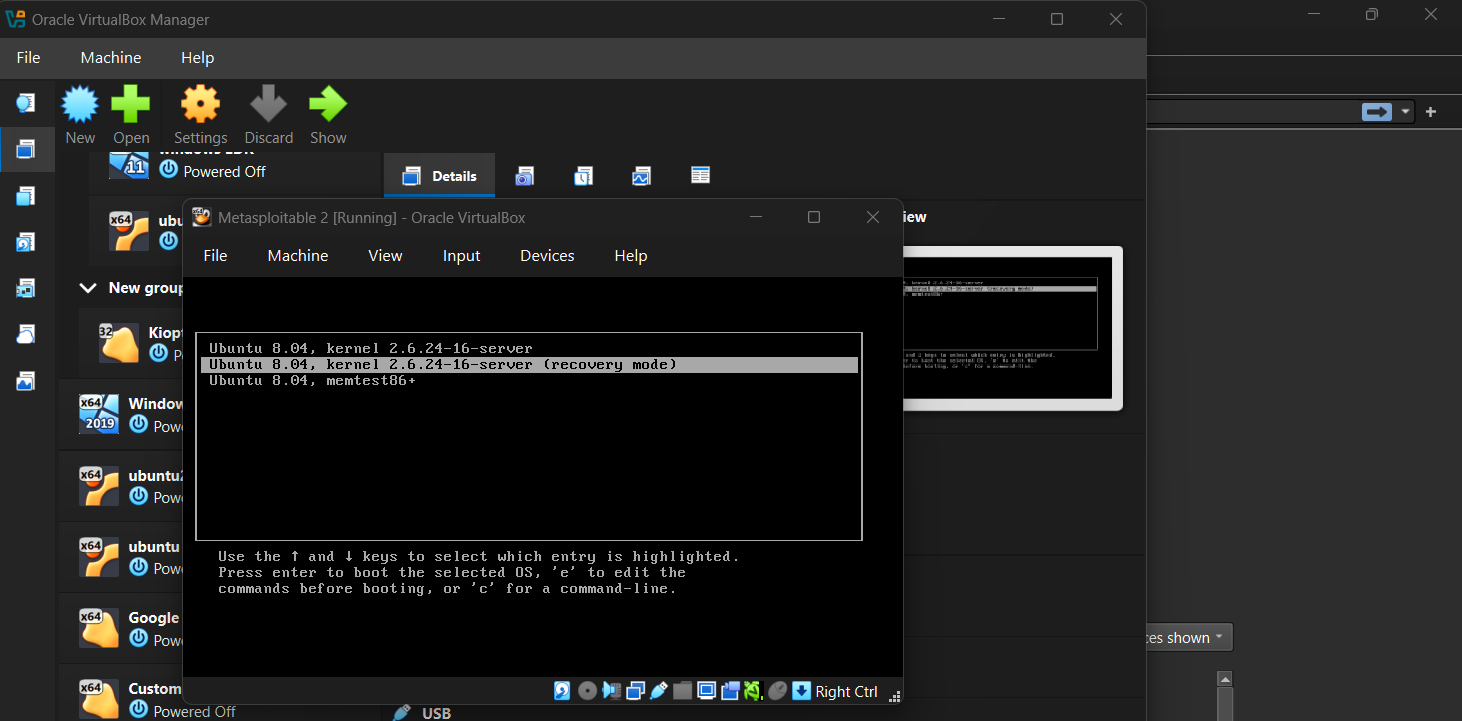 GRUB boot menu — selecting recovery mode
Step 9: Edit the Kernel Line
Navigate to the kernel /vmlinuz... line using the arrow keys and press e again to edit it.
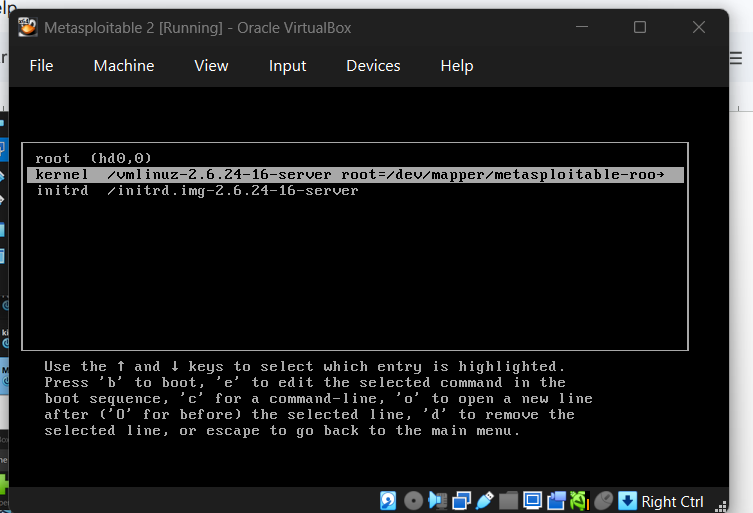 Kernel entry selected for editing
Step 10: Add noapic nolapic
Append noapic nolapic to the end of the kernel line so it reads:
1
<loitable-root ro single noapic nolapic
Then press b to boot.
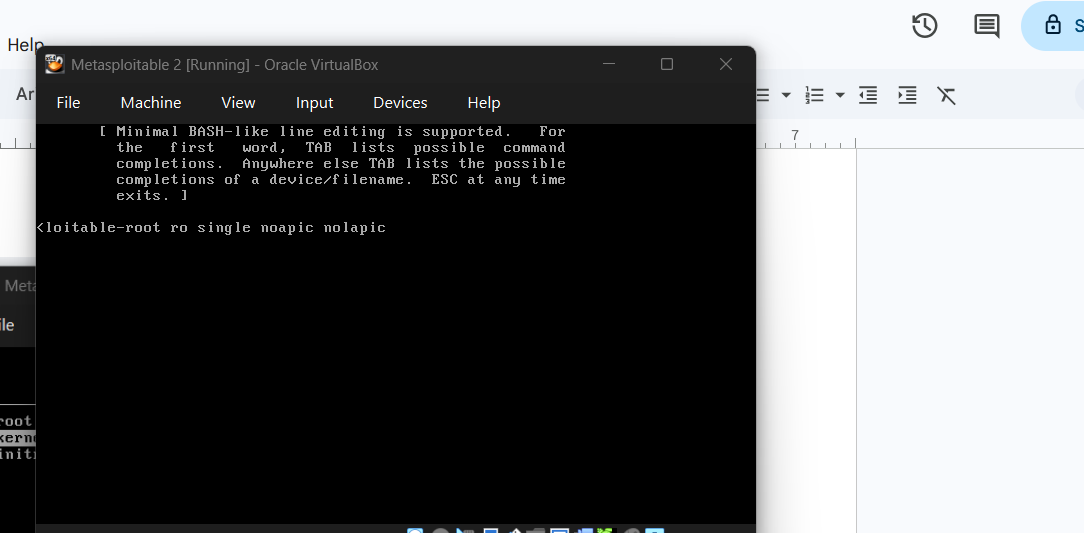 Kernel line edited with noapic nolapic appended
Step 11: Login
Once booted, log in with:
- Username:
msfadmin - Password:
msfadmin
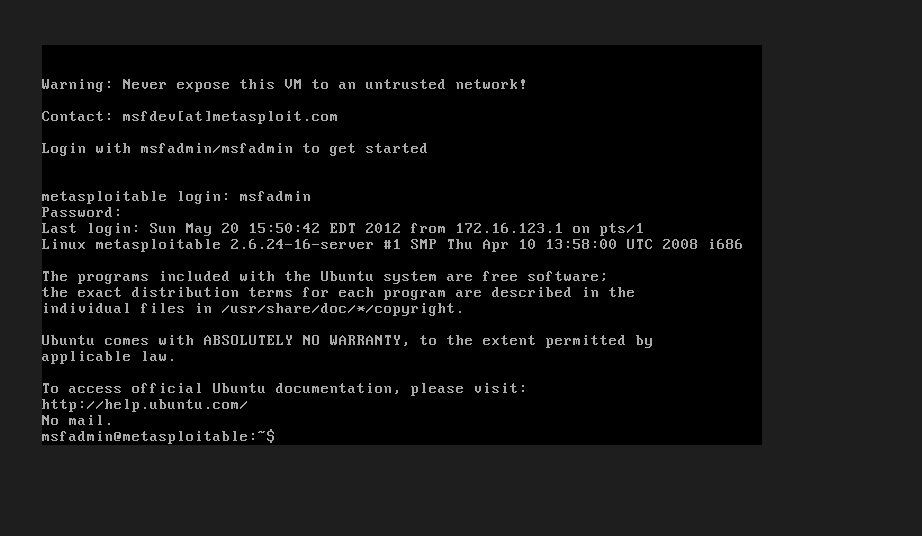 Successful Metasploitable 2 login — note the warning to never expose this VM to an untrusted network
Permanent Fix: Editing menu.lst
To avoid repeating the boot edit every time, apply the fix permanently by editing the GRUB configuration file.
Step 12: Open menu.lst in nano
1
sudo nano /boot/grub/menu.lst
Enter the password msfadmin when prompted.
 Running sudo nano to edit the GRUB boot configuration
Step 13: Append noapic nolapic to Both Kernel Lines
Scroll to the bottom of the file and find the two lines starting with kernel /vmlinuz.... Append noapic nolapic to the end of each:
1
2
3
4
5
# Change this:
kernel /vmlinuz-2.6.24-16-server root=/dev/mapper/metasploitable-root ro quiet splash

# To this:
kernel /vmlinuz-2.6.24-16-server root=/dev/mapper/metasploitable-root ro quiet splash noapic nolapic
Do the same for the ro single line.
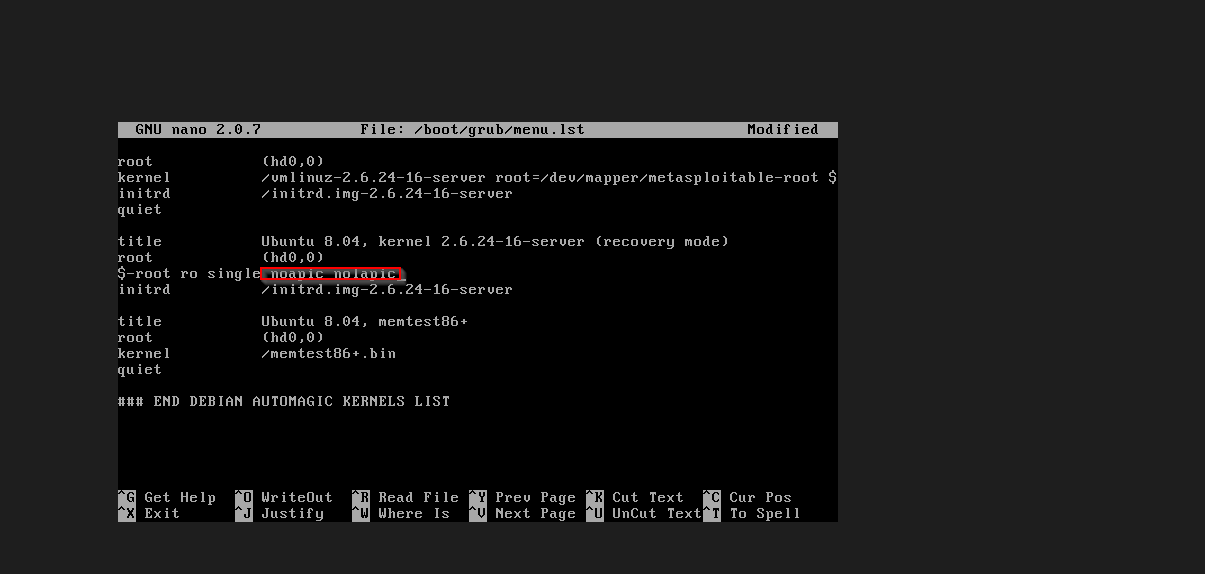 menu.lst with noapic nolapic highlighted in the recovery mode entry
Steps 14–15: Save and Reboot
Save with Ctrl+O, exit with Ctrl+X, then reboot:
1
sudo reboot
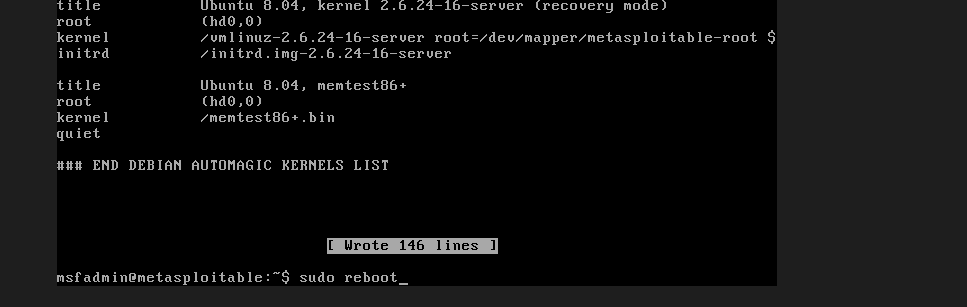 File saved (146 lines written) and sudo reboot issued
From this point on, Metasploitable 2 will boot cleanly every time without needing manual GRUB edits.
Part 2: Installing Nessus on Kali Linux
It is advisable to update and upgrade your system before installing Nessus.
1
sudo apt update && sudo apt upgrade -y
Step 1: Download Nessus
In your preferred directory, run:
1
wget https://www.tenable.com/downloads/api/v2/pages/nessus/files/Nessus-latest-debian10_amd64.deb
 Downloading the Nessus .deb package with wget
Step 2: Install with dpkg
1
sudo dpkg -i Nessus-*.deb
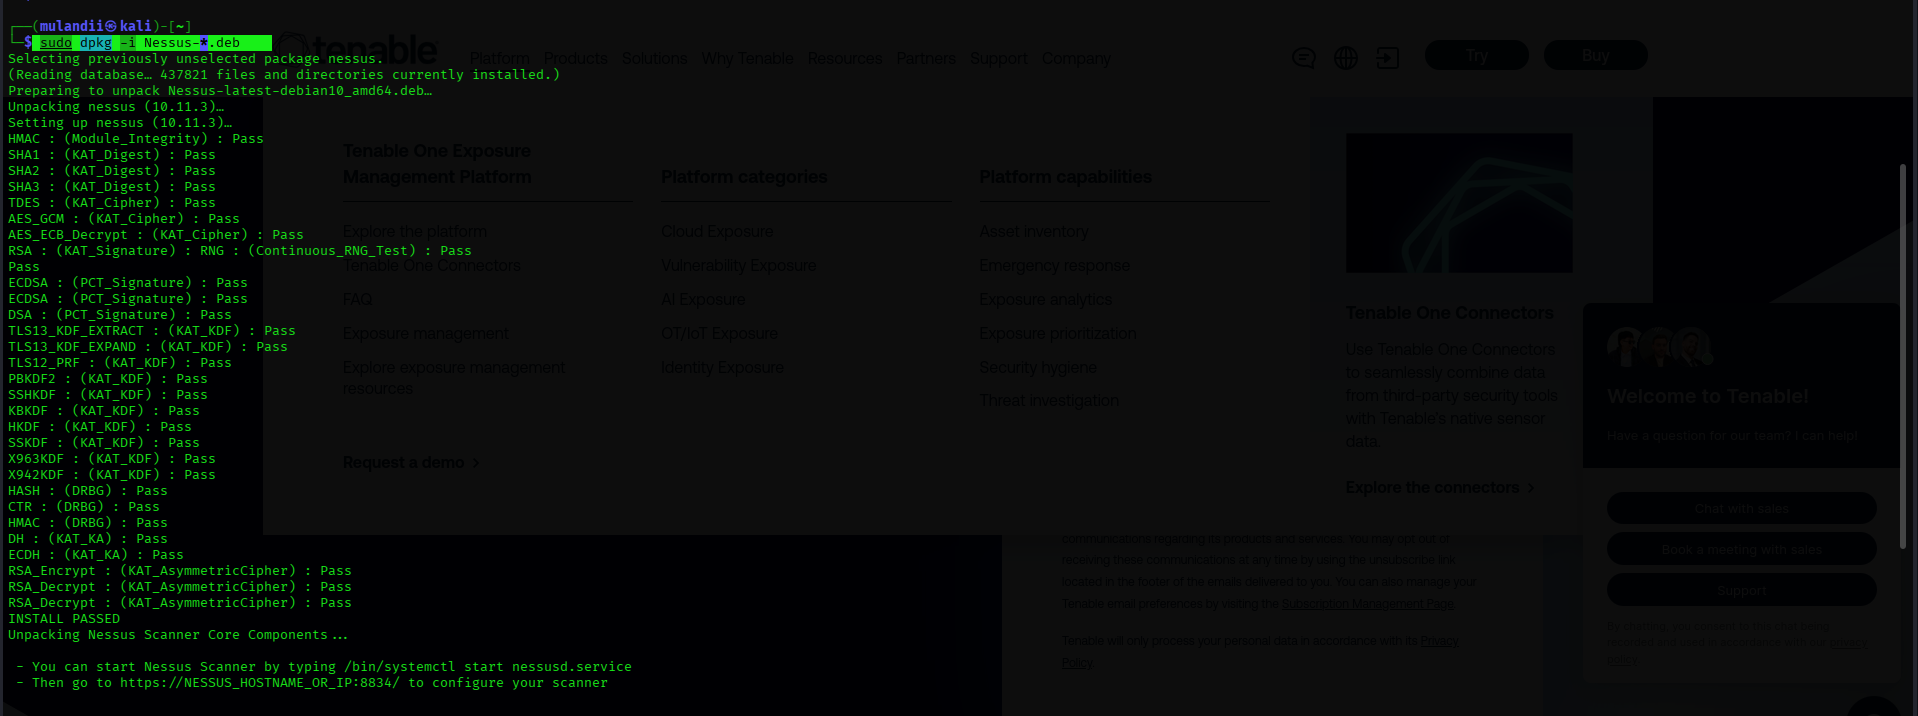 dpkg installing Nessus — all cryptographic component checks pass
Steps 3–5: Start, Enable, and Verify
1
2
3
sudo systemctl start nessusd
sudo systemctl enable nessusd
sudo systemctl status nessusd
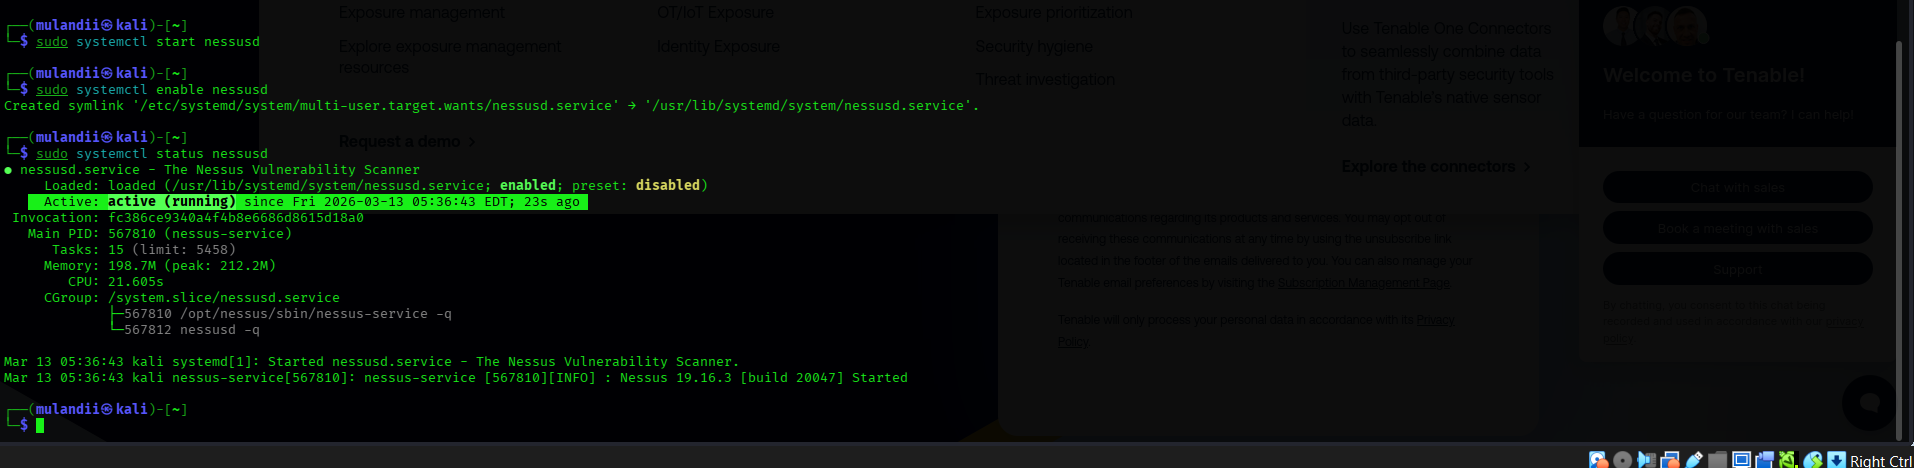 nessusd service active and running — Nessus 19.16.3 started successfully
Step 6: Access the Nessus Web Interface
Visit localhost:8834 in the browser. Firefox will display a security warning about the self-signed certificate — this is expected. Click Advanced → Accept the Risk and Continue.
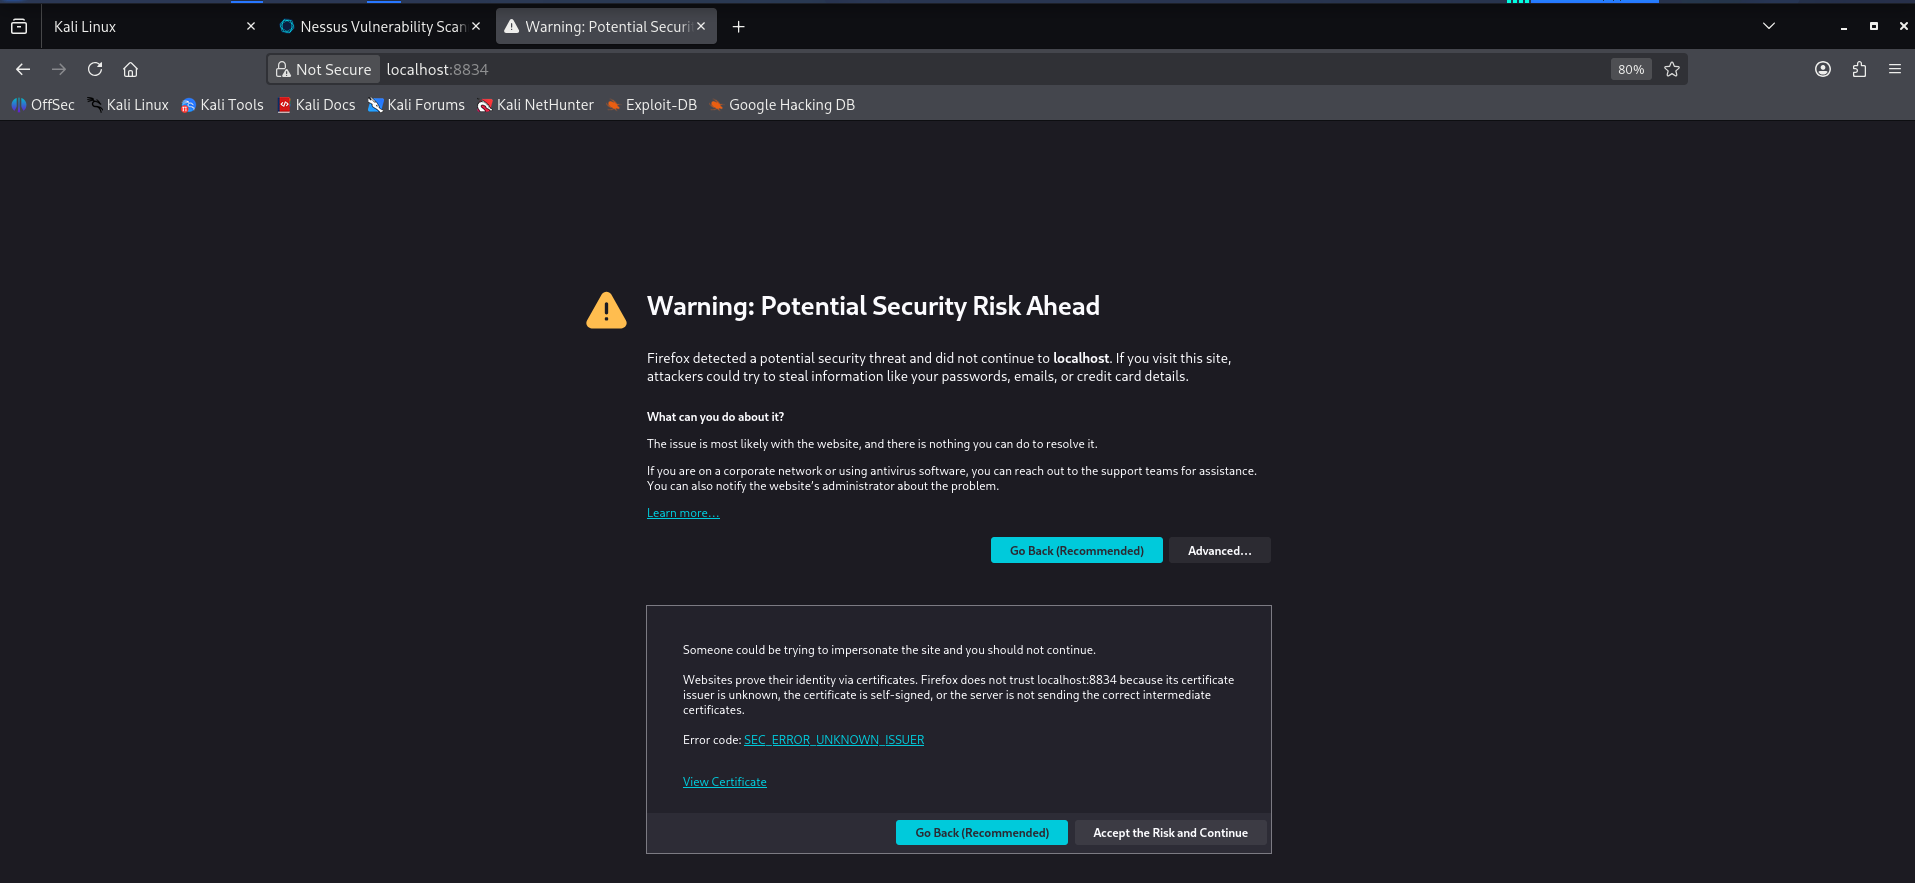 Firefox SSL warning for localhost:8834 — click Accept the Risk and Continue
Steps 7–12: Initial Setup
After proceeding past the SSL warning, you will land on the Nessus setup page:
- Select Register for Nessus Essentials and click Continue
- Enter your name and email to receive a free activation code
- Verify your email, then create a username and password for the Nessus dashboard
- Wait for plugin initialisation and download to complete — this can take 15+ minutes
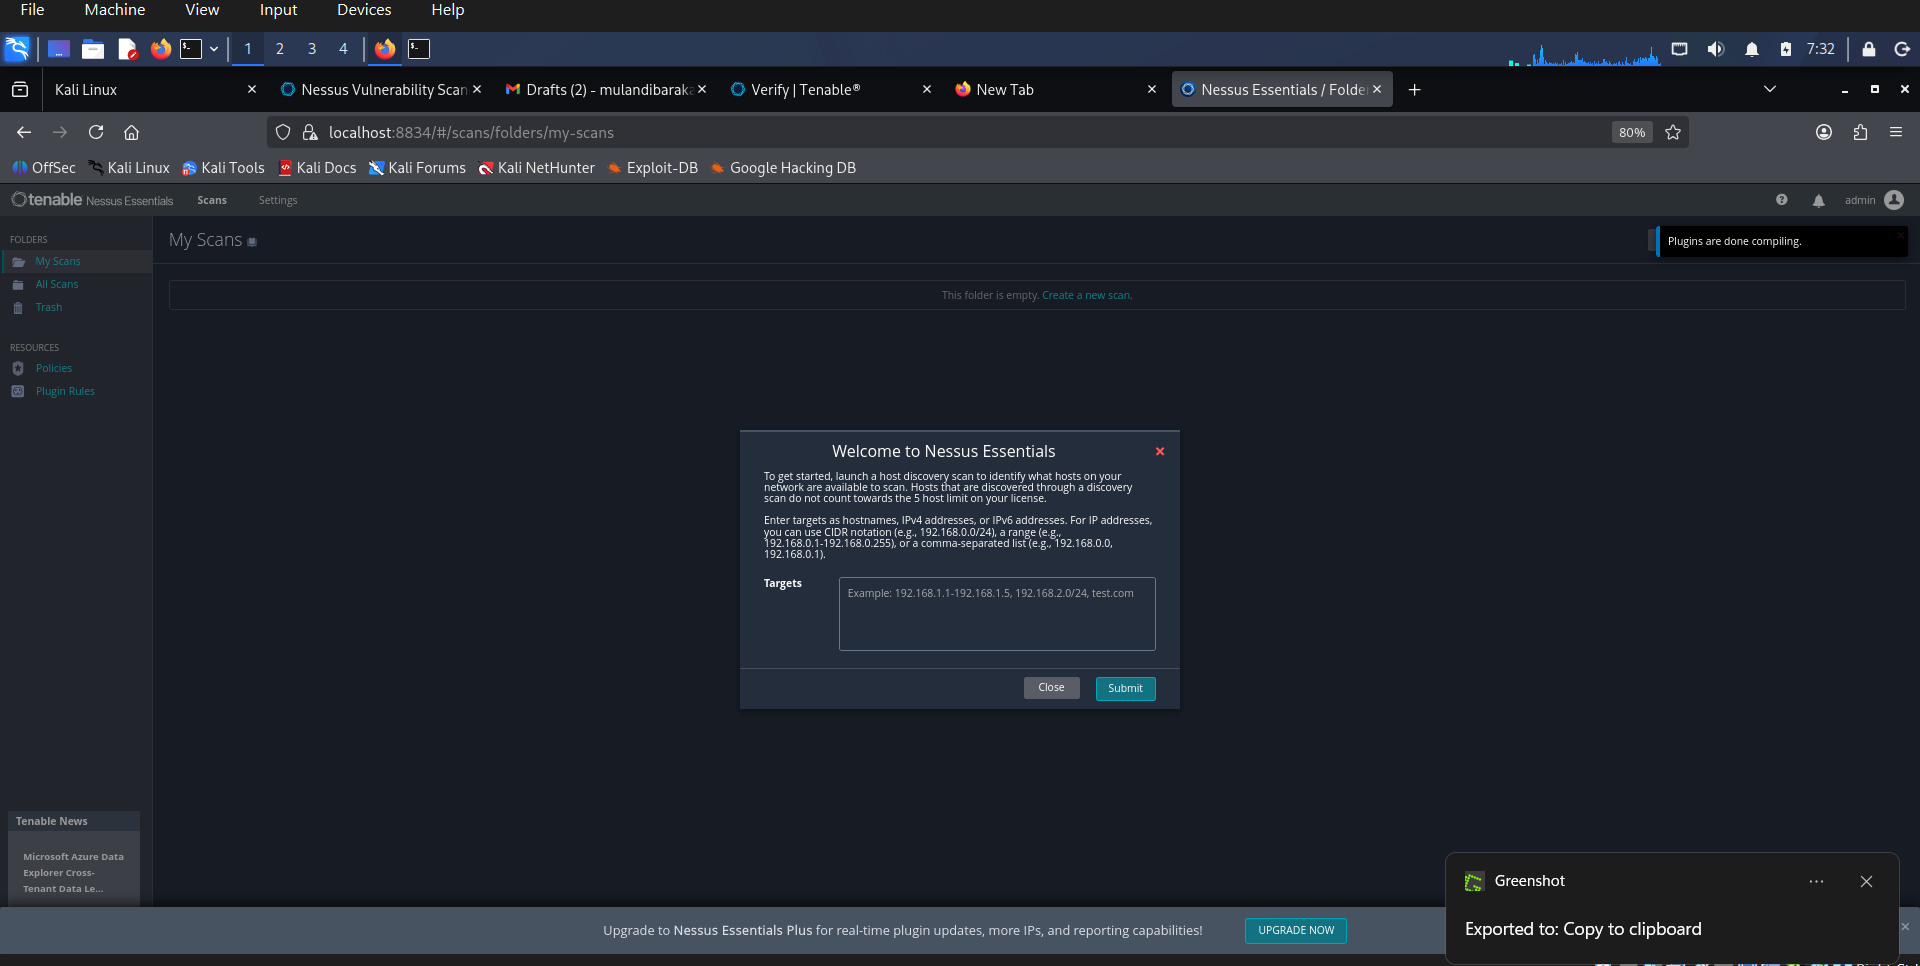 Nessus Essentials dashboard on Kali — plugins compiled, ready for host discovery
Nessus on Kali installation complete.
Part 3: Network Configuration for Scanning
All three VMs must be able to communicate with each other. Ensure every VM has its Adapter 1 set to Host-Only Adapter under Settings → Network.
Verify IP Addresses
Metasploitable 2 — run ip a:
1
eth0: inet 192.168.35.7/24
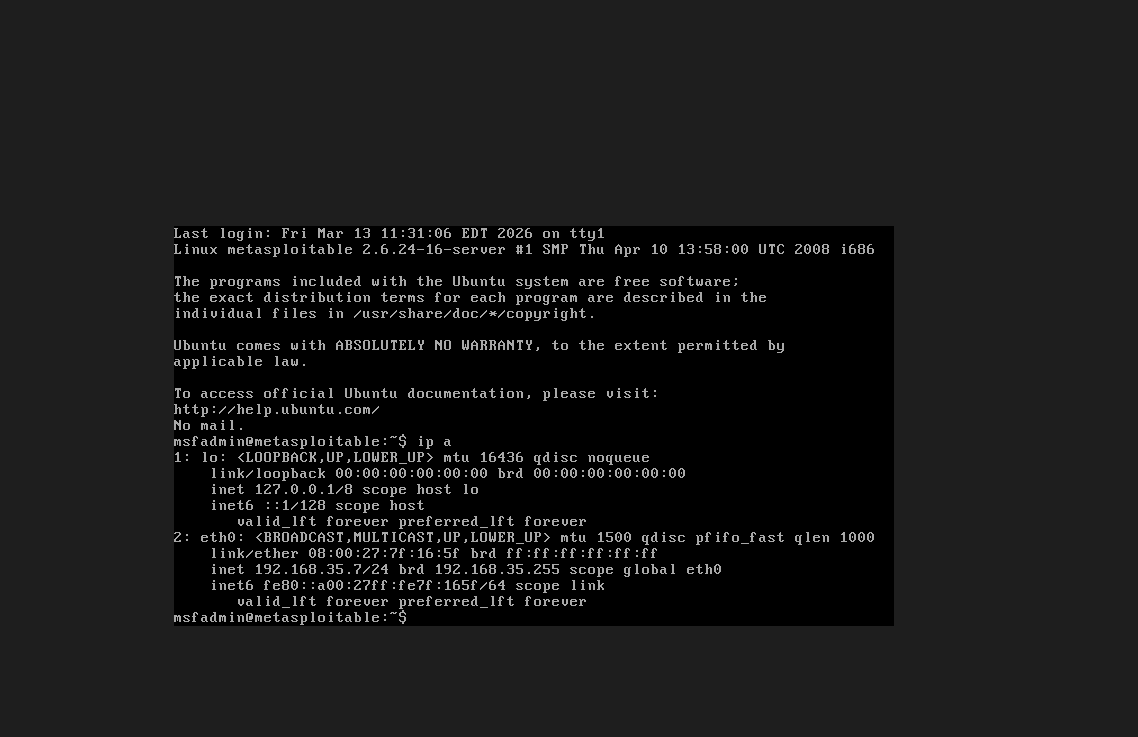 Metasploitable 2 confirmed on 192.168.35.7
Kali Linux — run ip a:
1
eth0: inet 192.168.35.8/24
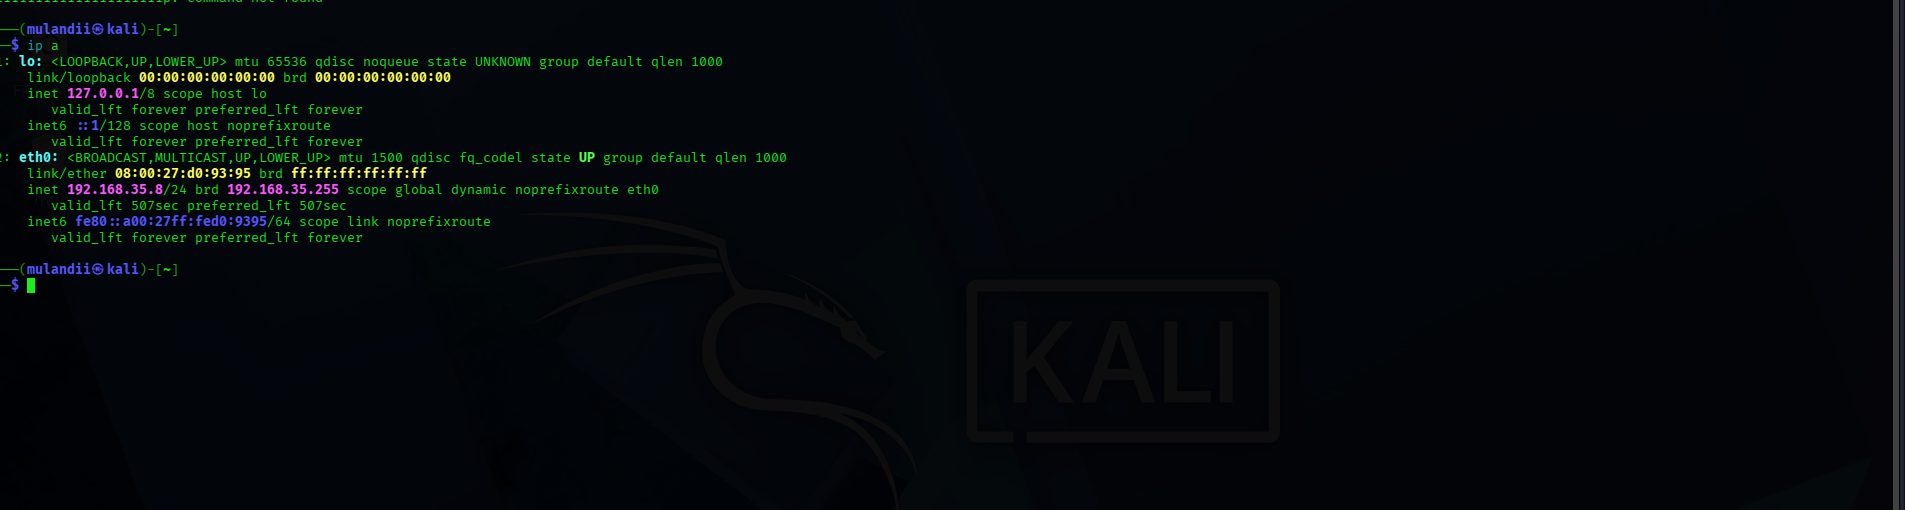 Kali Linux confirmed on 192.168.35.8 — same subnet
All three machines are confirmed on the 192.168.35.0/24 subnet.
Part 4: Running the Scans
Host Discovery
Before scanning for vulnerabilities, run a Host Discovery scan targeting the subnet 192.168.35.0/24. Nessus will enumerate all live hosts on the network.
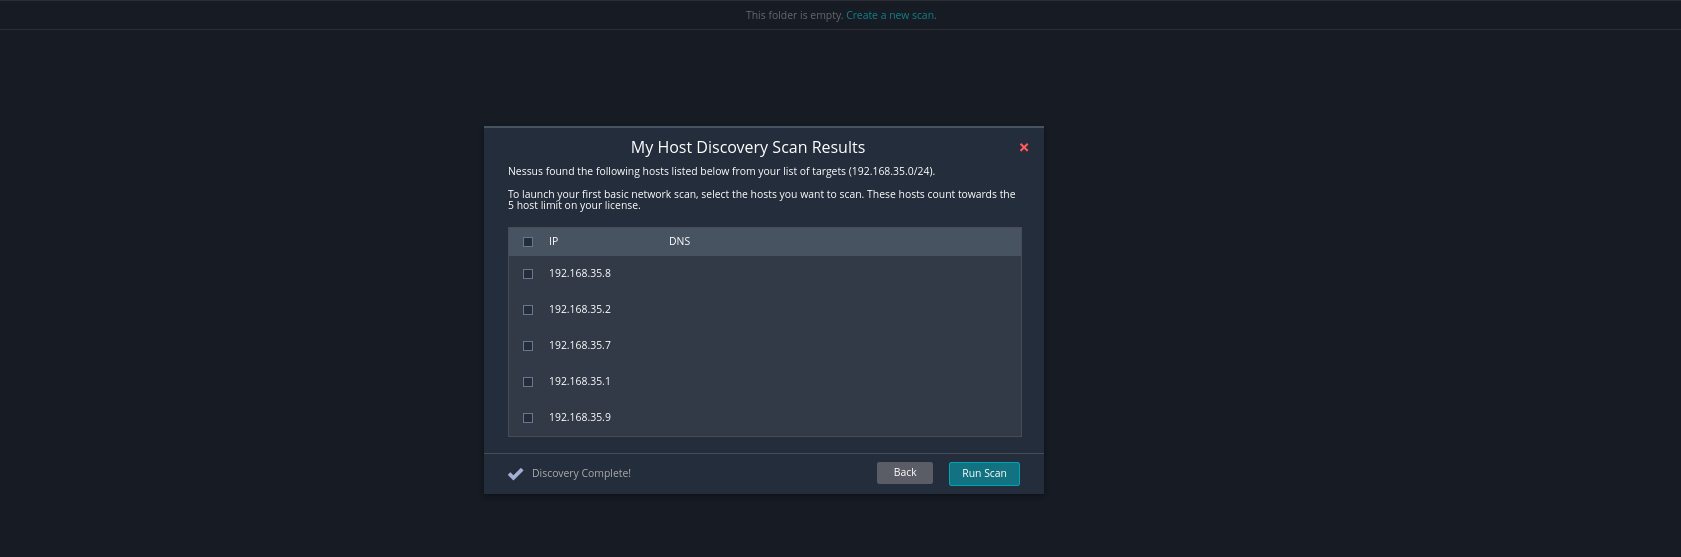 Host discovery results — 5 hosts found on 192.168.35.0/24 including our three VMs
Creating a Vulnerability Scan
Click New Scan and select Basic Network Scan from the scan templates.
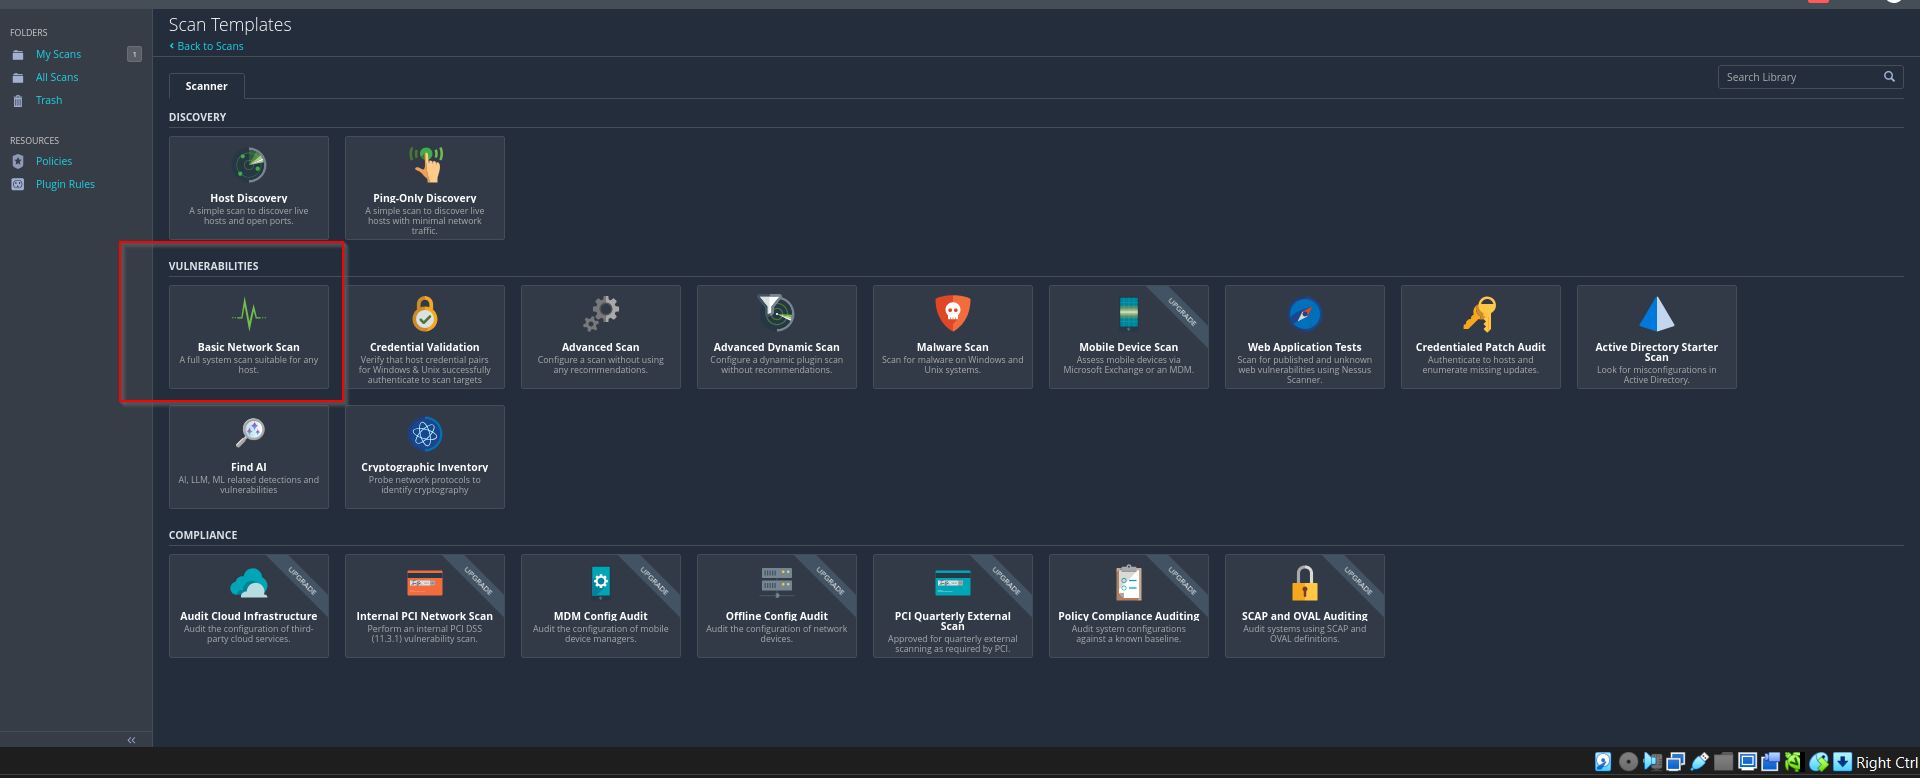 Scan templates — Basic Network Scan selected under Vulnerabilities
Fill in the scan name, description, and enter the target IP in the Targets field. For Metasploitable, the target is 192.168.35.7.
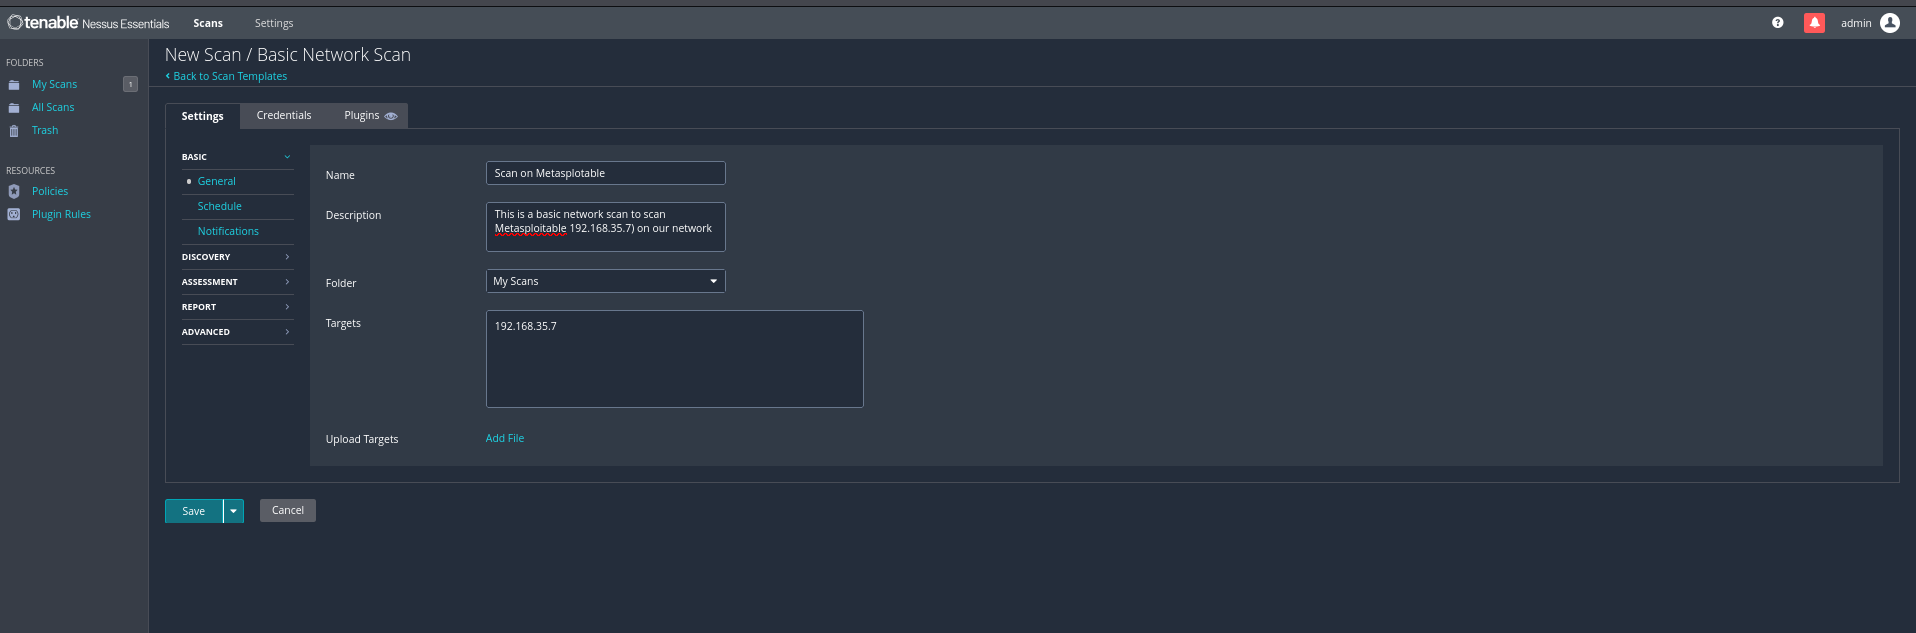 Scan configuration — name, description, and target IP for the Metasploitable scan
Click Save, then hit the Play button next to the scan to launch it.
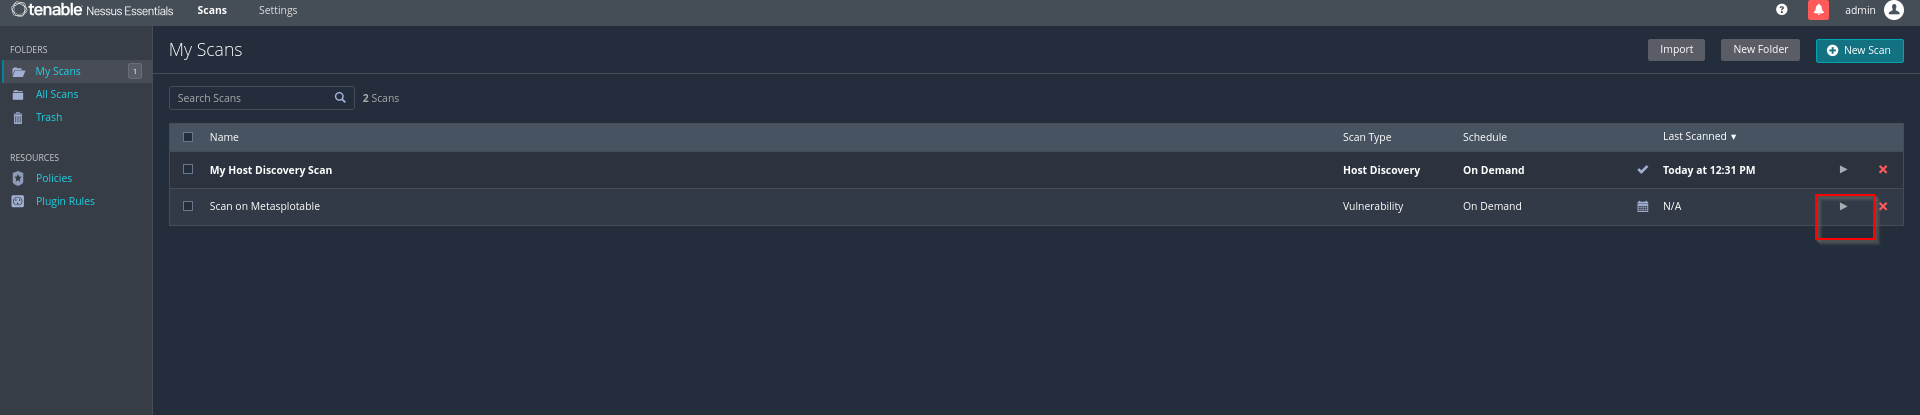 My Scans — Host Discovery and Metasploitable scan both queued
Scan Results — Metasploitable 2
The Metasploitable scan took 18 minutes to complete. The results revealed a heavily vulnerable machine — as expected.
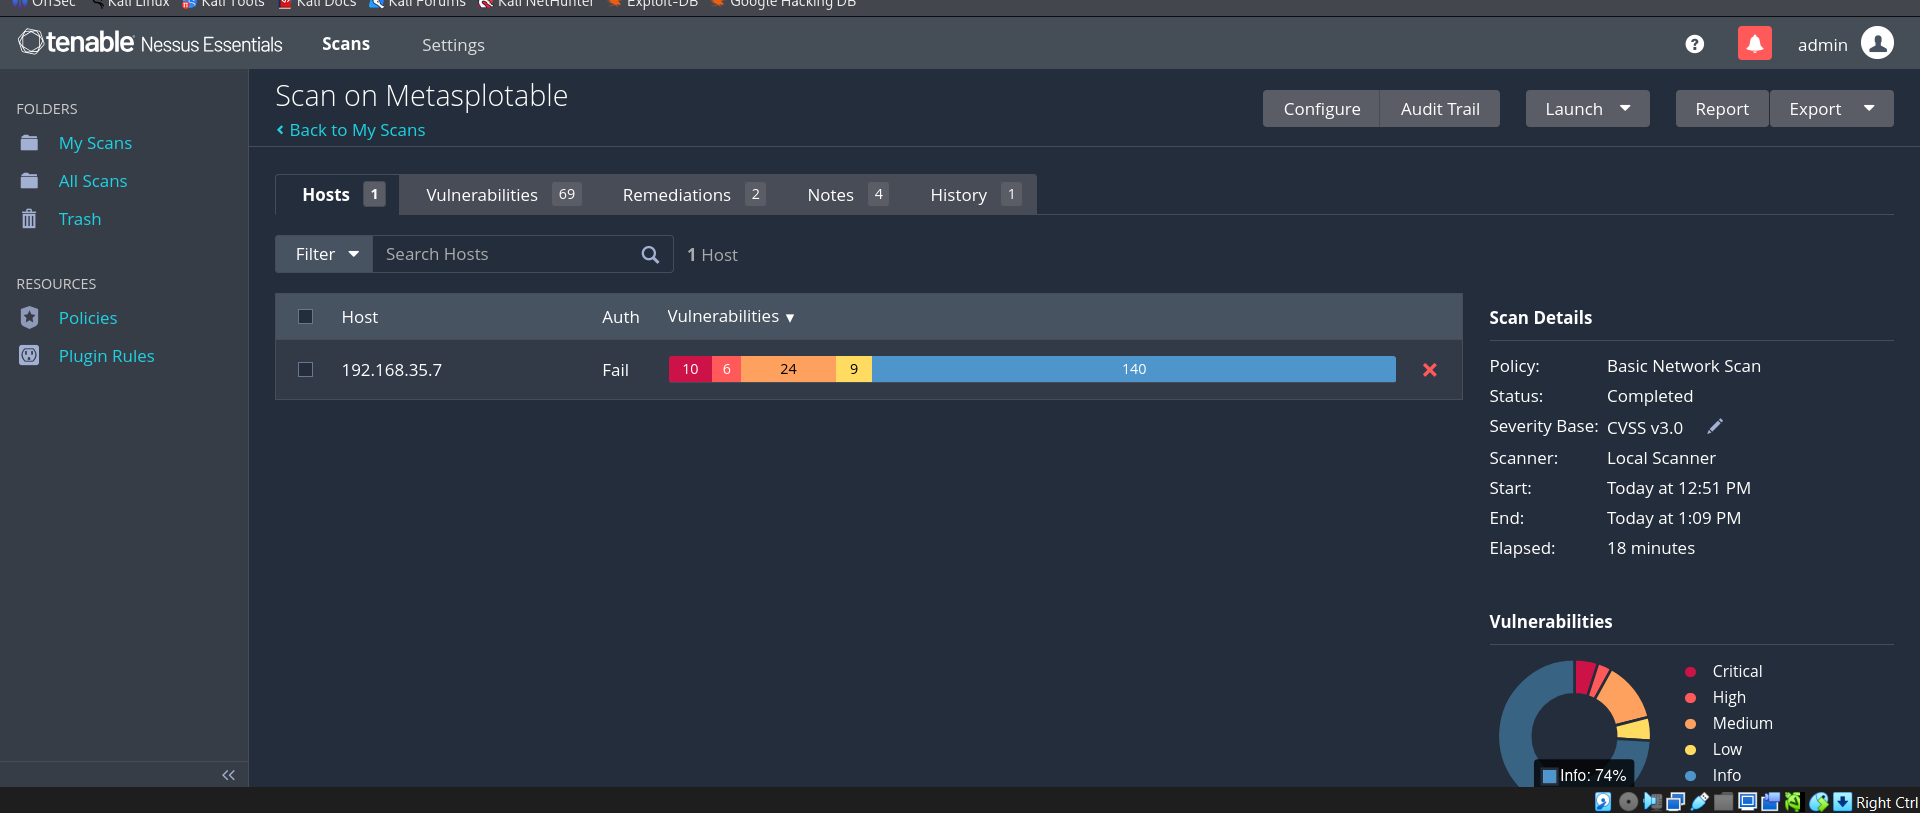 Completed scan — 192.168.35.7 shows 10 Critical, 6 High, 24 Medium, 9 Low, and 140 Info findings
Viewing Vulnerabilities
Click the scan to open it, then navigate to the Vulnerabilities tab to see all 69 detected vulnerabilities, each with severity ratings, CVSS scores, and remediation guidance.
 Vulnerabilities tab — 69 total vulnerabilities detected on Metasploitable
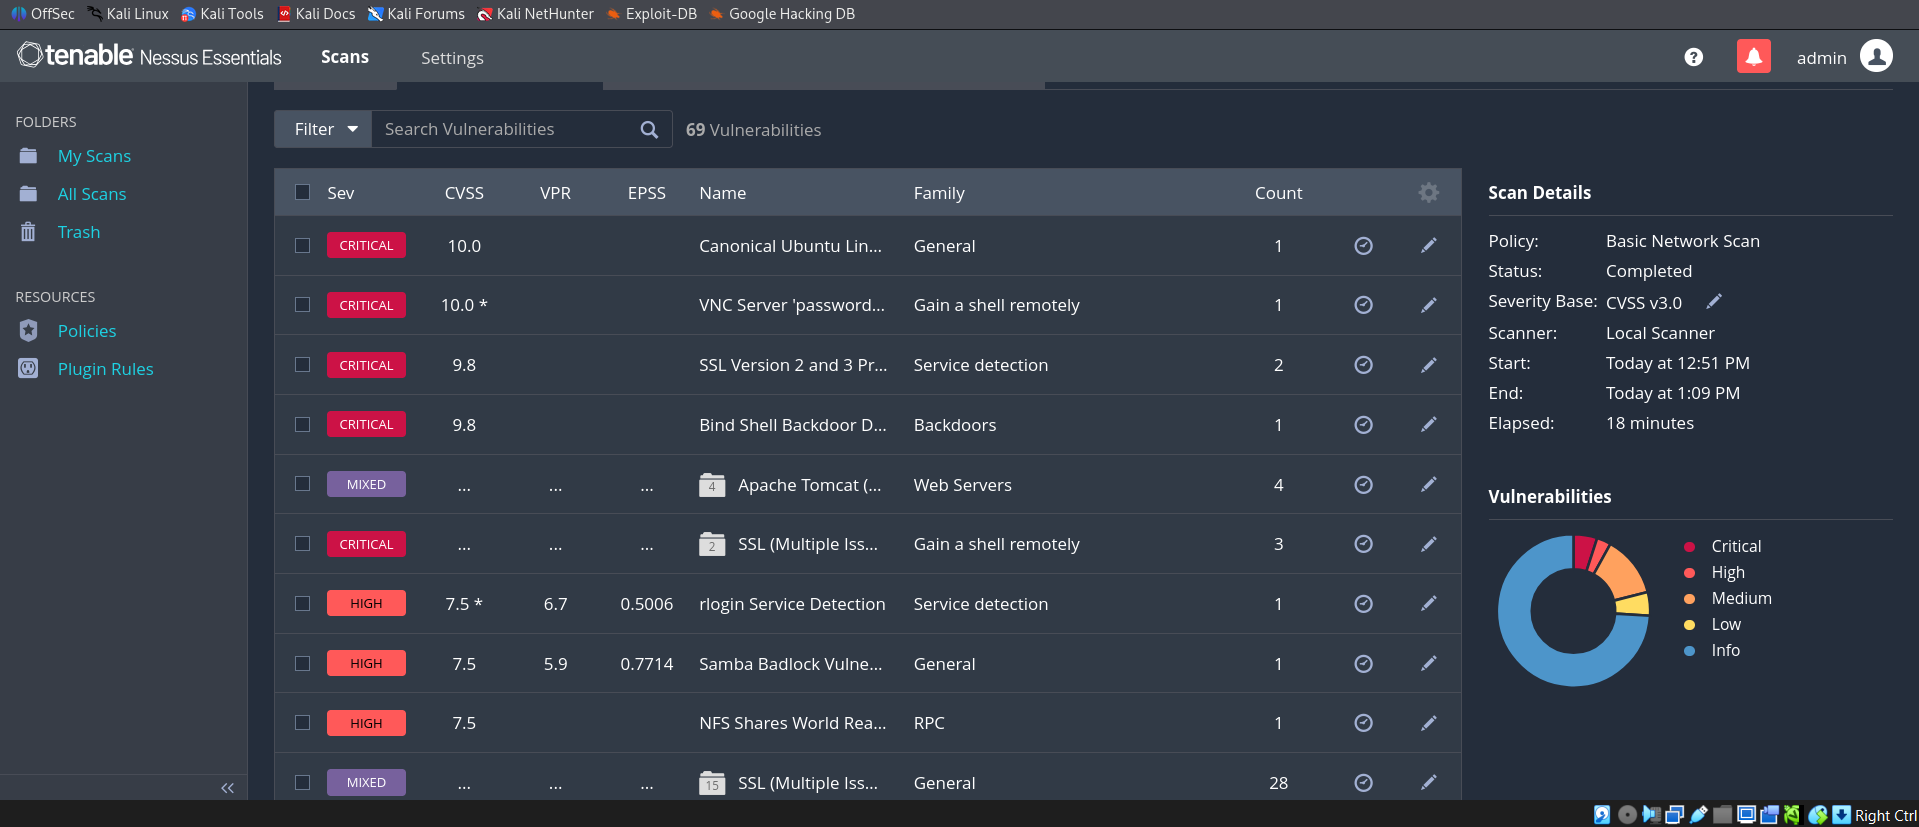 Full vulnerability list — multiple Critical findings including VNC weak password, Bind Shell Backdoor, SSL v2/v3, and Samba BadLock
Example: VNC Server ‘password’ Password (CRITICAL — CVSS 10.0)
One of the most striking findings was the VNC server secured with the literal password password. Nessus was able to authenticate directly, confirming that any unauthenticated attacker on the network could take full control of the system through VNC.
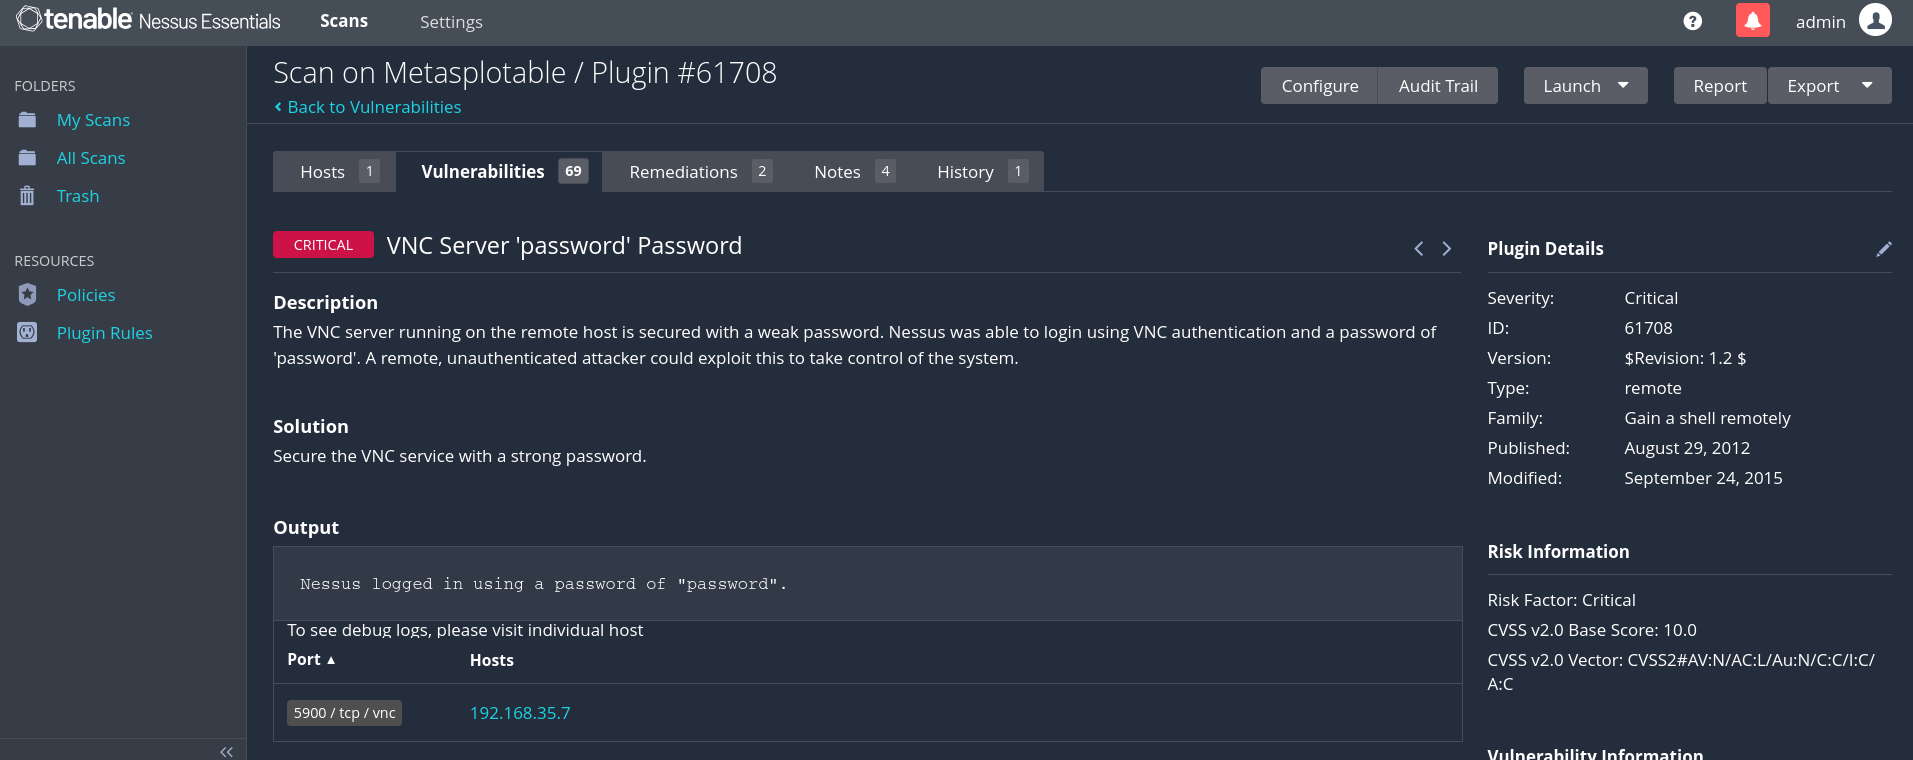 Plugin #61708 — VNC Server ‘password’ Password. CVSS 10.0 Critical. Nessus logged in using a password of “password”
This is a stark reminder of how dangerous default or trivially guessable credentials can be on any service exposed to a network.
Part 5: Report Generation
Once a scan is complete, Nessus can generate a detailed PDF report of all findings.
- Open the completed scan from My Scans
- Click Report in the top right
- Select your preferred template — for this lab, Detailed Vulnerabilities By Host was selected
- Choose PDF format and click Generate Report
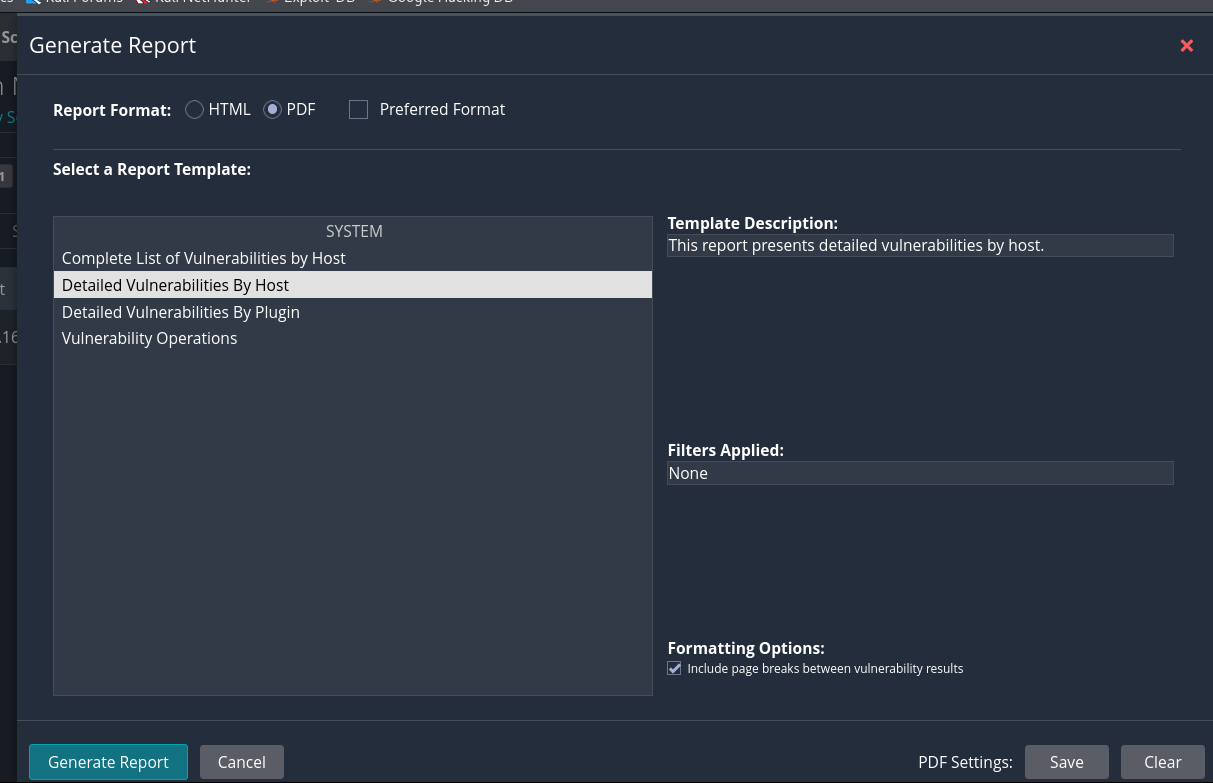 Report generation dialog — Detailed Vulnerabilities By Host template selected
The generated report for the Metasploitable scan was 247 pages — a comprehensive breakdown of every vulnerability, its description, CVSS score, affected port, and recommended remediation.
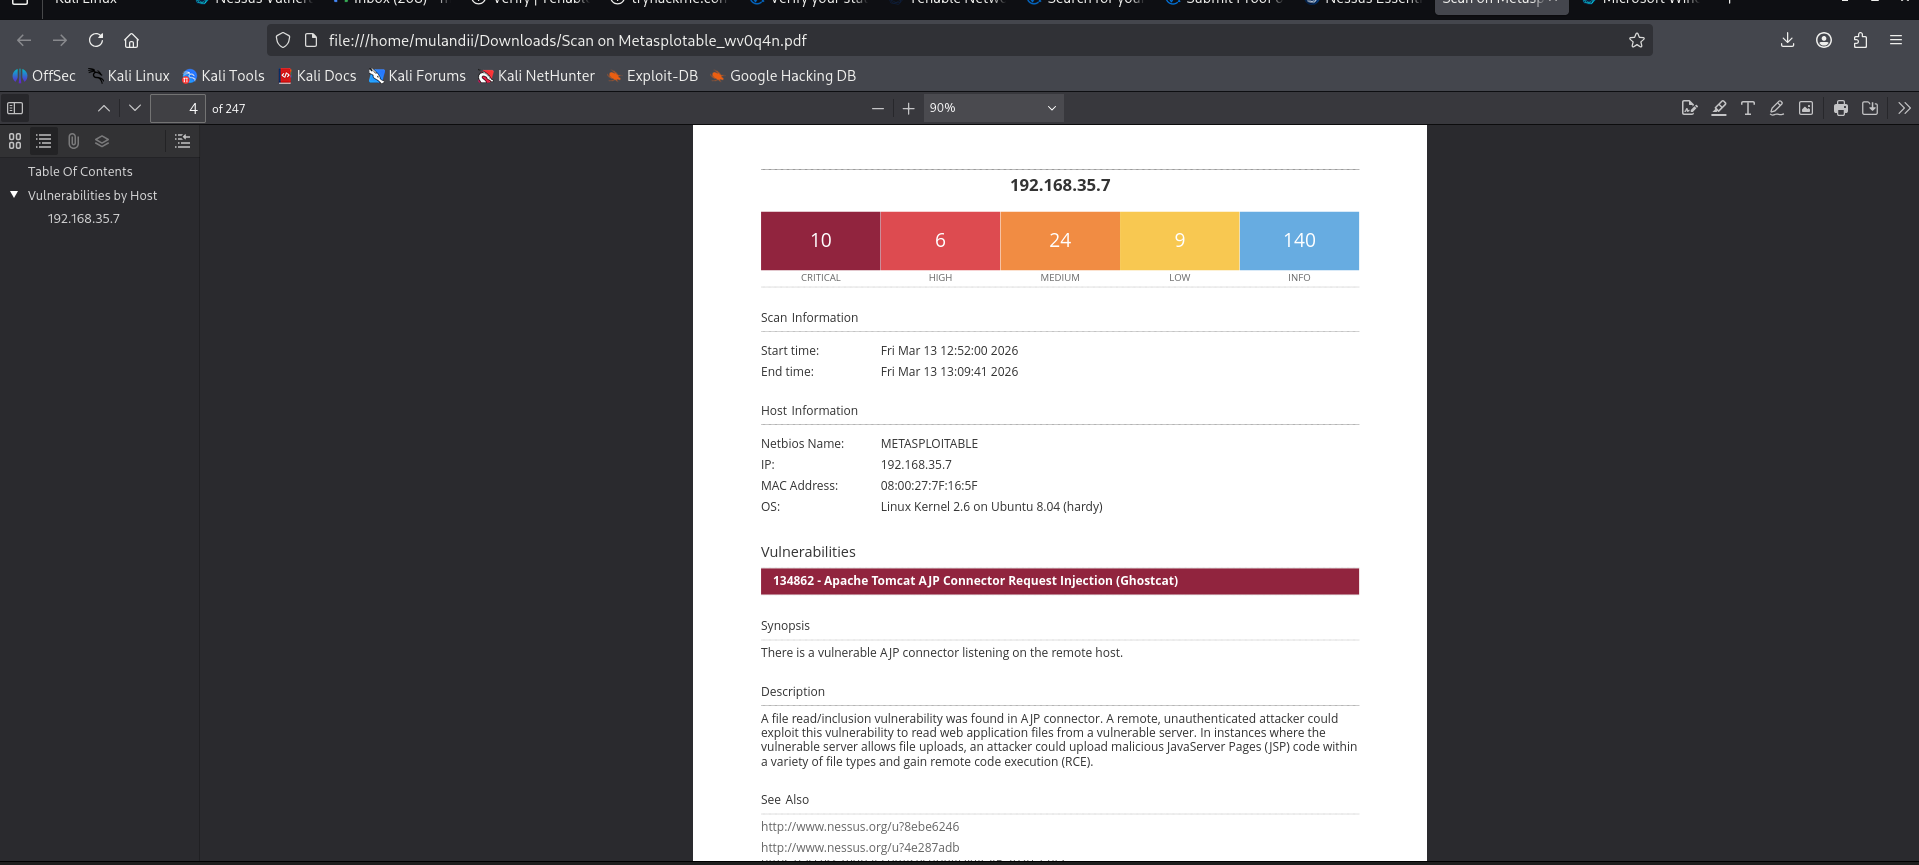 Sample page from the generated PDF report — 10 Critical, 6 High, 24 Medium findings for 192.168.35.7
Note: Report export is a feature of Nessus Essentials Plus and higher. Free Essentials users can view results in the dashboard but cannot export. Students can upgrade to Essentials Plus for free using a valid school email through https://federation.proxi.id/emailer/kindly-juggle/.
Summary & Key Takeaways
This lab walked through the complete setup of a personal vulnerability scanning environment and demonstrated just how exposed an unpatched, misconfigured machine can be.
The Metasploitable 2 scan uncovered 10 critical vulnerabilities — including a VNC server with the literal password password, an exposed Bind Shell backdoor (CVSS 9.8), outdated SSL v2/v3 protocols, and a Samba BadLock vulnerability. These are not theoretical risks; they are exploitable findings on a live machine.
Key lessons:
- Default credentials are indefensible. If a service has a default or trivially guessable password, it will be found and exploited.
- Vulnerability scanning is a fundamental hygiene tool. Running a basic network scan in 18 minutes surfaced 69 vulnerabilities with actionable remediation guidance for each.
- Network isolation matters. Running intentionally vulnerable machines on a Host-Only network ensures the lab never leaks onto the production network or internet.
- Report generation supports real-world documentation. A 247-page detailed vulnerability report is the kind of deliverable a security team would produce for a client or internal stakeholders.
References
Metasploitable 2 — Rapid7. https://www.rapid7.com/products/metasploit/metasploitable/
Nessus Essentials Download — Tenable. https://www.tenable.com/downloads/nessus
Nessus User Documentation — Tenable. https://docs.tenable.com/nessus/
CVSS v3.0 Specification — FIRST. https://www.first.org/cvss/v3.0/specification-document