Designing a Simple SOC Network My First Home Lab Setup
A detailed guide on designing a mini SOC lab with network segmentation for enhanced security and monitoring
Introduction
When I started building a home Security Operations Center (SOC) lab, I assumed the difficult part would be installing detection tools.
Instead, the biggest challenge was networking.
This post documents how I built and configured the network foundation of a SOC lab using:
- a Windows endpoint (EDR)
- a Linux network sensor (NDR)
This lab is a walkthrough of what I did.
Lab Overview
This lab uses:
- VirtualBox for virtualization
- Windows 10 as the endpoint (EDR)
- Ubuntu Server as the network sensor (NDR)
Each virtual machine uses three network adapters, connected to three different traffic planes:
- Internet & management
- Internal monitored traffic
- Secure admin access from the host
Understanding this separation is the key to understanding SOC networking.
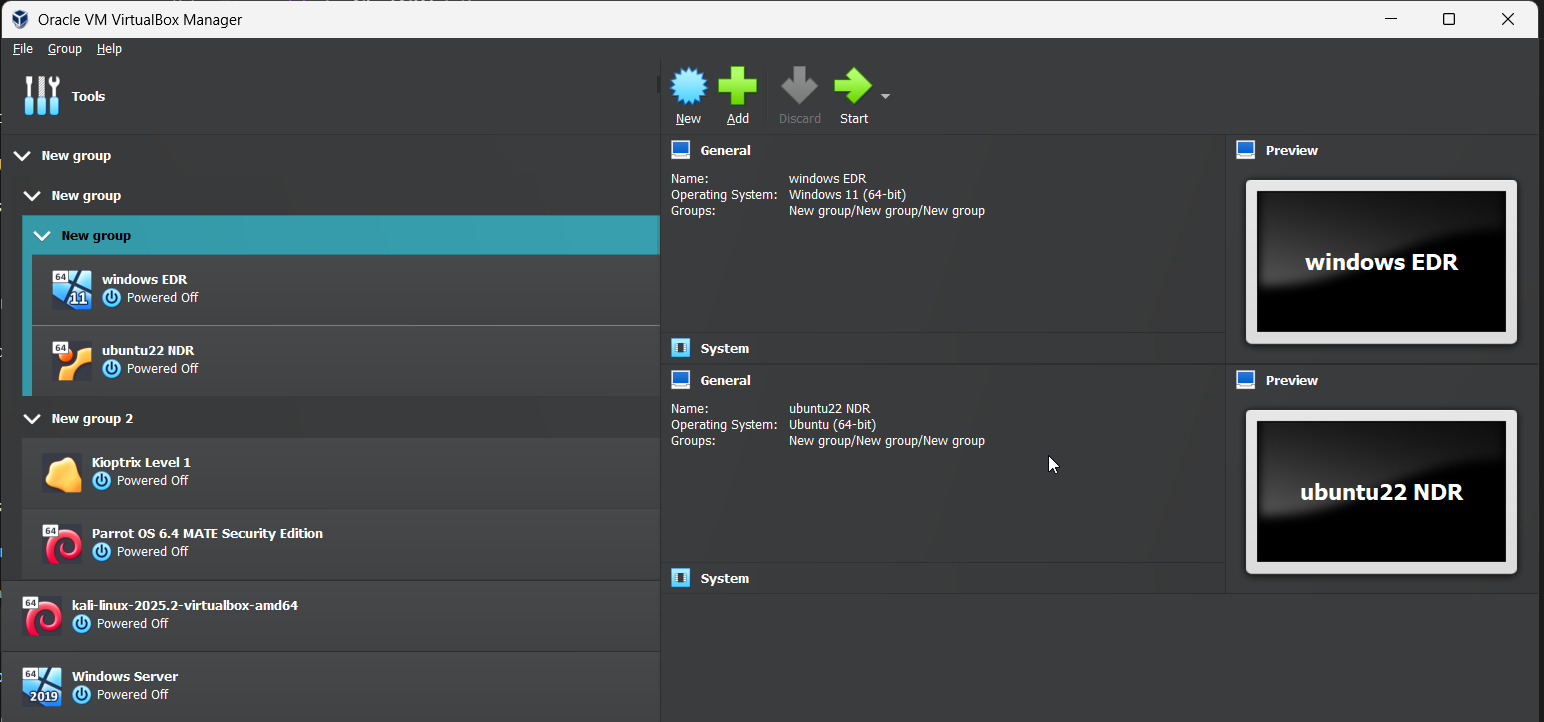 Windows EDR VM and Ubuntu NDR VM
Phase 1: VirtualBox Network Configuration (Host Level)
Before creating or configuring any virtual machines, the networks themselves must exist.
In this lab, only two networks are created manually:
- a NAT Network
- a Host-Only Network
A third network, called an Internal Network, is created automatically by VirtualBox when selected later.
Step 1.1: Creating the NAT Network (Internet & Management)
The NAT Network allows:
- internet access
- software updates
- controlled communication between VMs
Steps
- Open VirtualBox
- Go to File → Tools → Network Manager
- Open the NAT Networks tab
- Click Create
Configure:
1
2
3
4
Name: SOC_Network
IPv4 Prefix: 10.0.50.0/24
DHCP: Disabled
IPv6: Disabled
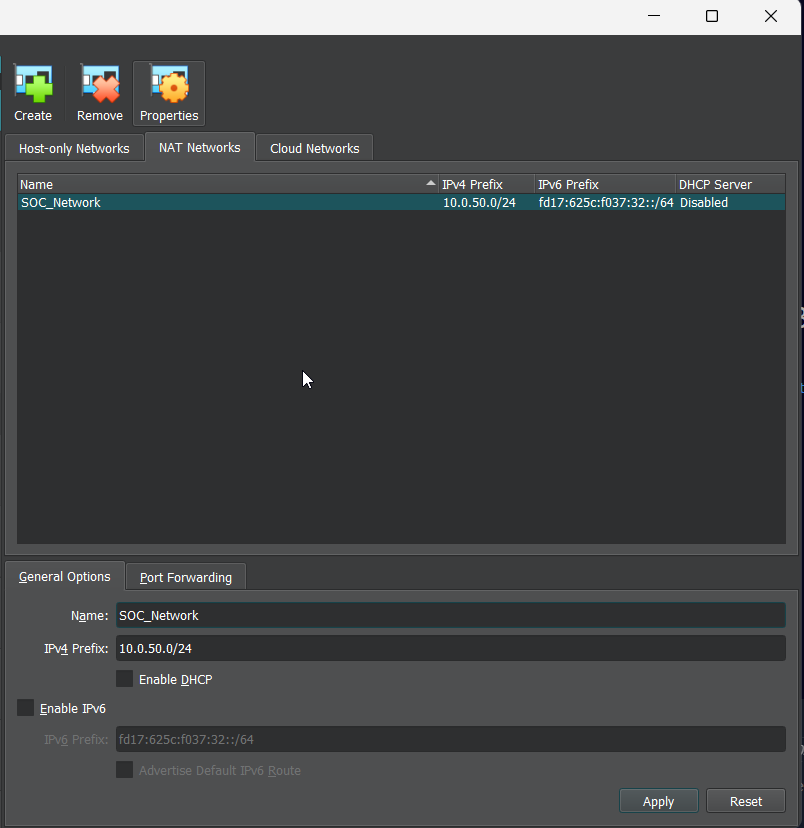 NAT configuration in Virtualbox
Why this matters
Using a NAT Network:
- keeps VMs isolated from the physical LAN
- avoids exposing the lab directly to the home network
Step 1.2: Creating the Host-Only Network (Admin Access)
The Host-Only Network allows:
- the host machine to access the VMs
- secure RDP and SSH access
- management without internet exposure
Steps
- In Network Manager, open Host-Only Networks
- Click Create
- Open Properties
Configure:
1
2
3
IPv4 Address: 10.0.60.1
Subnet Mask: 255.255.255.0
DHCP: Disabled
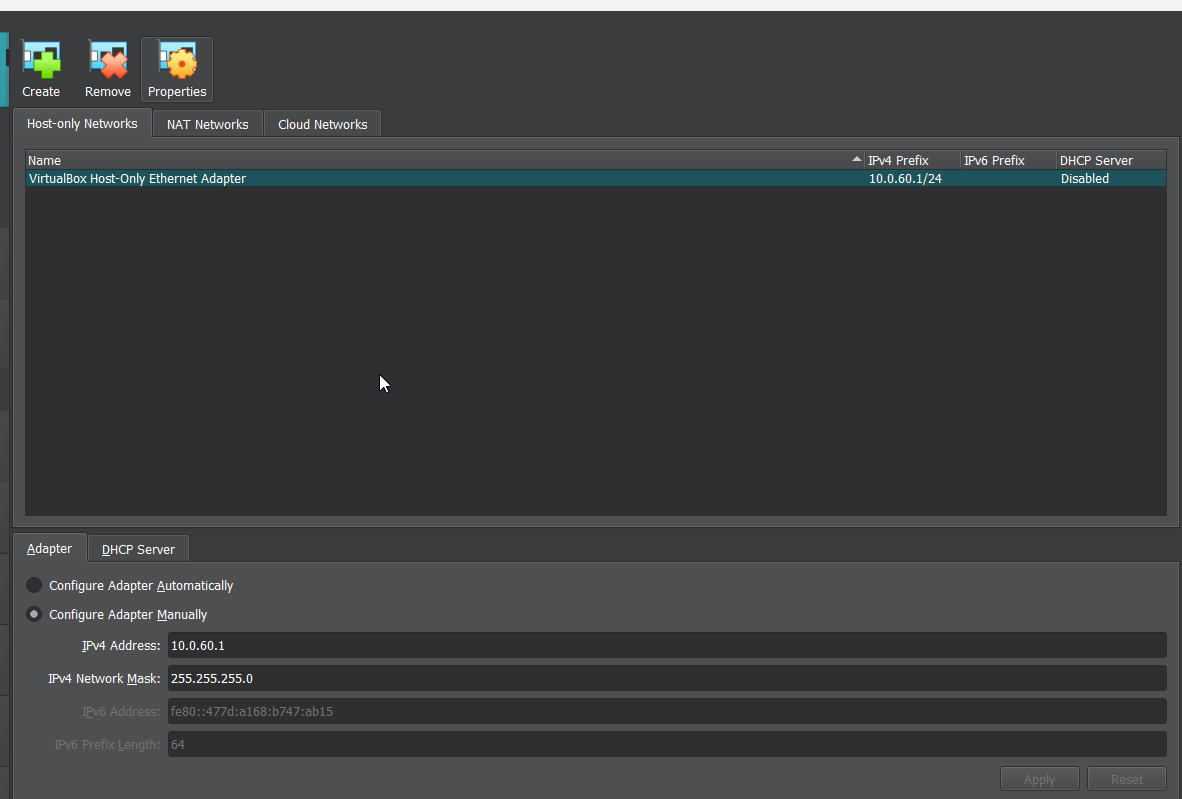 Host-Only Network configuration
Why this matters
This network acts like a private admin cable:
- only the host and the VMs can see it
- traffic here is never exposed externally
Step 1.3: Verifying Network Creation
In the host pc powershell ,I confirmed by running
1
2
VBoxManage list natnetworks
VBoxManage list hostonlyifs
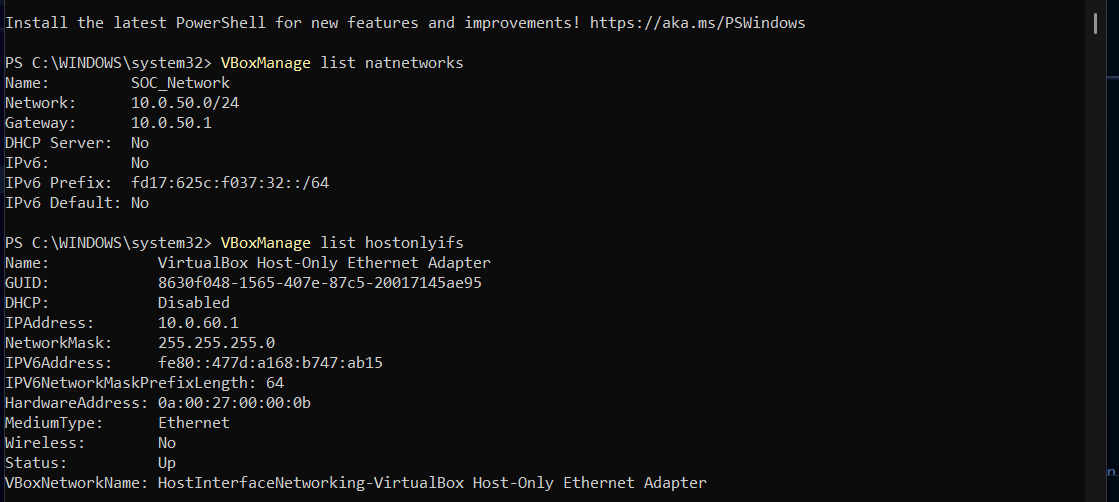
This confirms that both networks exist before moving on.
Phase 2: Creating and Configuring the Windows EDR VM
The Windows EDR VM represents a normal user workstation inside an organization.
Its role is to:
- generate activity
- act as an attack target
- simulate what SOC analysts investigate
Step 2.1: Create the Windows VM
I had already created the VM. I reccommend using this in the setup
1
2
3
4
5
Name: Windows-EDR
Type: Microsoft Windows
Version: Windows 10 (64-bit)
Memory: 4 GB
Disk: 60 GB (VDI, dynamically allocated)
Step 2.2: Attach Network Adapters
This VM uses three network adapters, each with a different purpose.
| Adapter | Network | Purpose |
|---|---|---|
| Adapter 1 | NAT Network | Internet & updates |
| Adapter 2 | Internal Network | Monitored traffic |
| Adapter 3 | Host-Only | RDP access |
Configuration
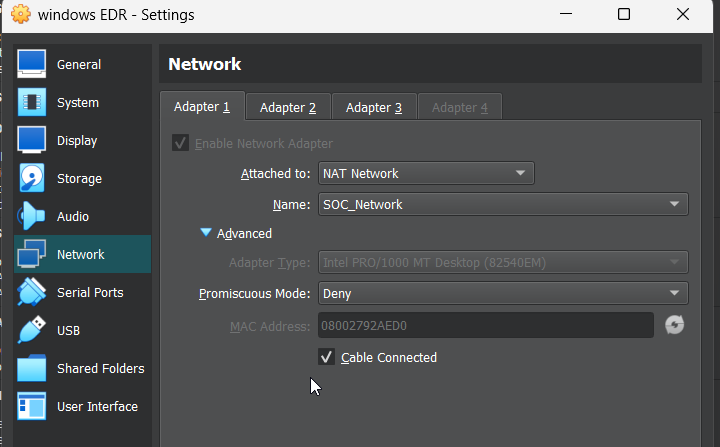
Adapter 1
1
2
Attached to: NAT Network
Name: SOC_Network
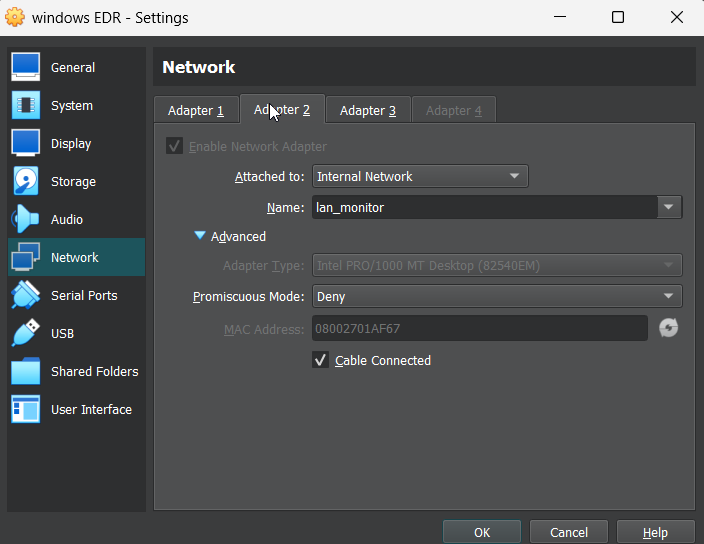
Adapter 2
1
2
Attached to: Internal Network
Name: lan_monitor
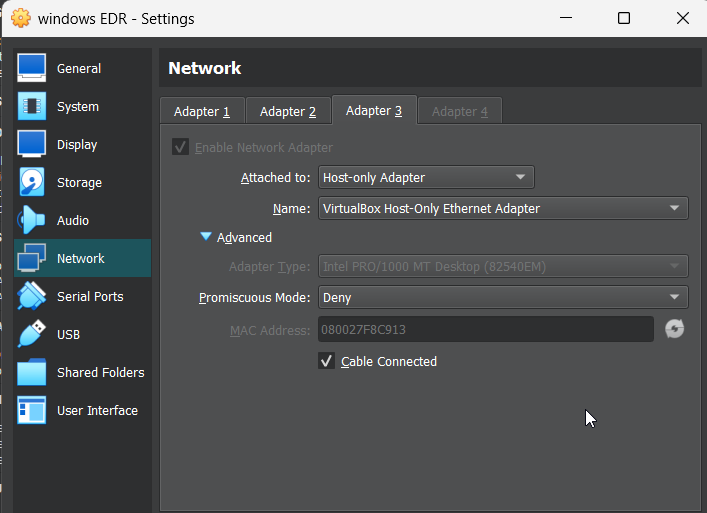
Adapter 3
1
2
Attached to: Host-Only Adapter
Name: vboxnet0
Why three adapters?
Each adapter connects the VM to a different trust zone:
- one for internet
- one for internal traffic
- one for administration
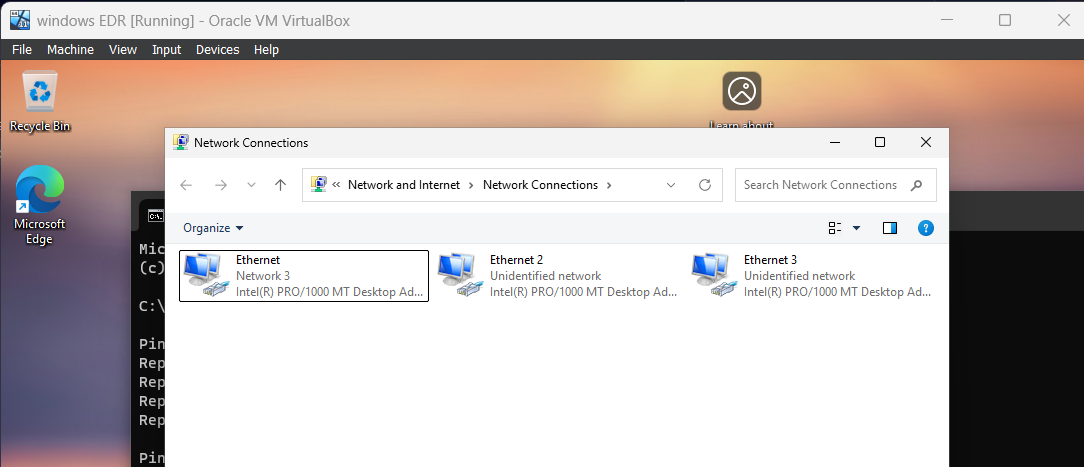
Step 2.3: Configuring Windows Network Interfaces
After installing Windows and logging in:
- Press Win + R or open the cmd and
Type:
1
ncpa.cpl
- Press Enter
You should see three Ethernet adapters.
Step 2.4: Assigning Static IP Addresses
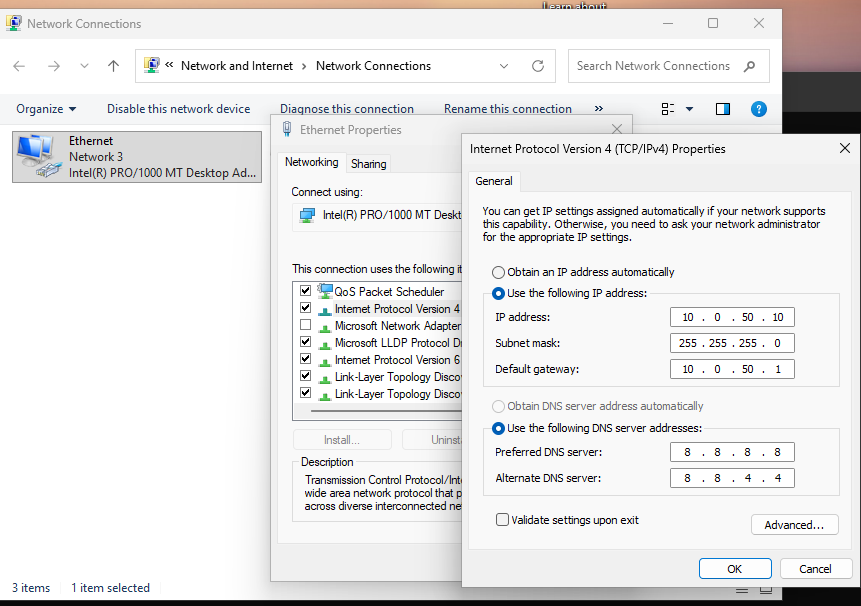
Adapter 1 — NAT Network
1
2
3
4
IP: 10.0.50.10
Subnet: 255.255.255.0
Gateway: 10.0.50.1
DNS: 8.8.8.8
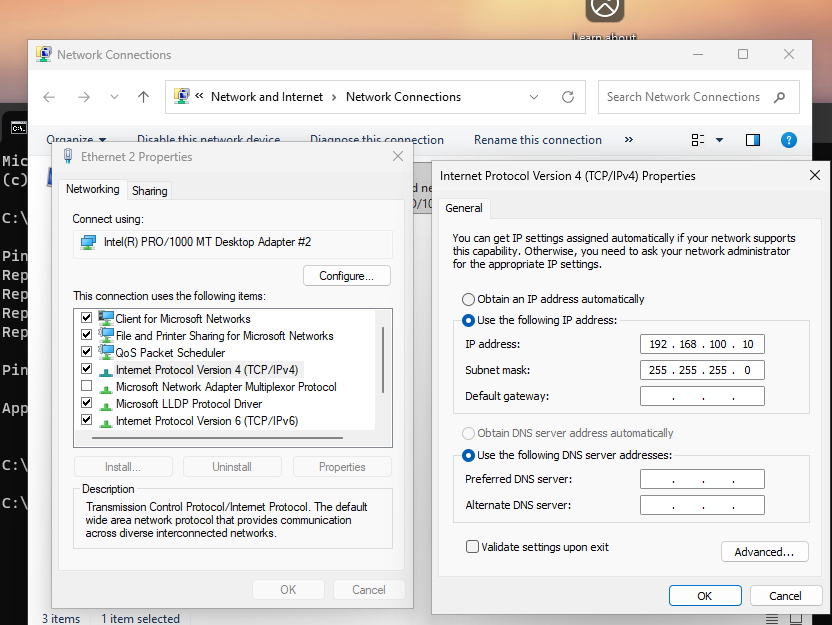
Adapter 2 — Internal Network
1
2
3
4
IP: 192.168.100.10
Subnet: 255.255.255.0
Gateway: None
DNS: None
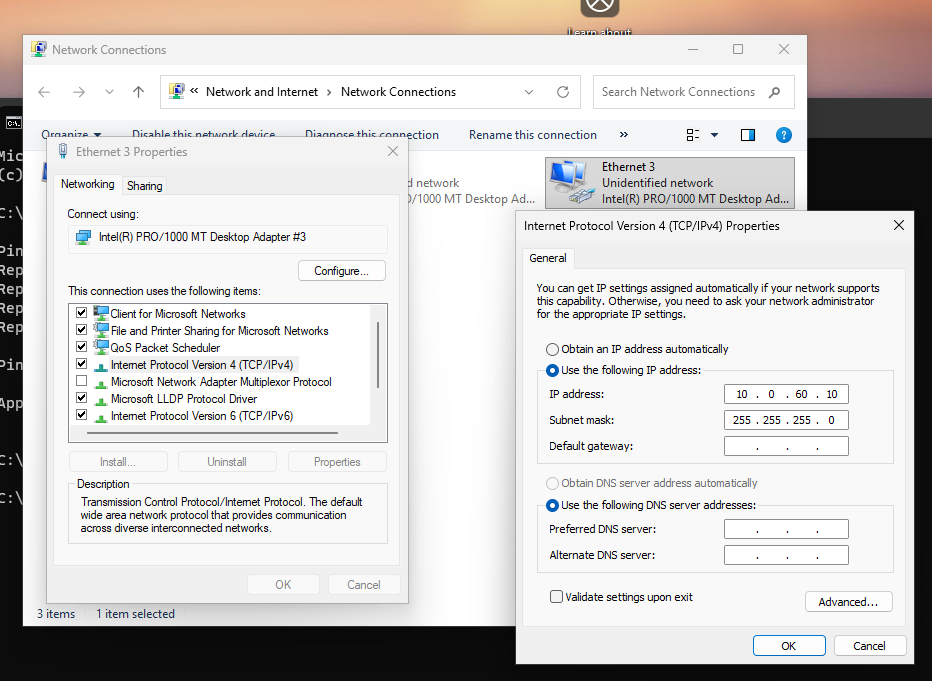
Adapter 3 — Host-Only Network
1
2
3
4
IP: 10.0.60.10
Subnet: 255.255.255.0
Gateway: None
DNS: None
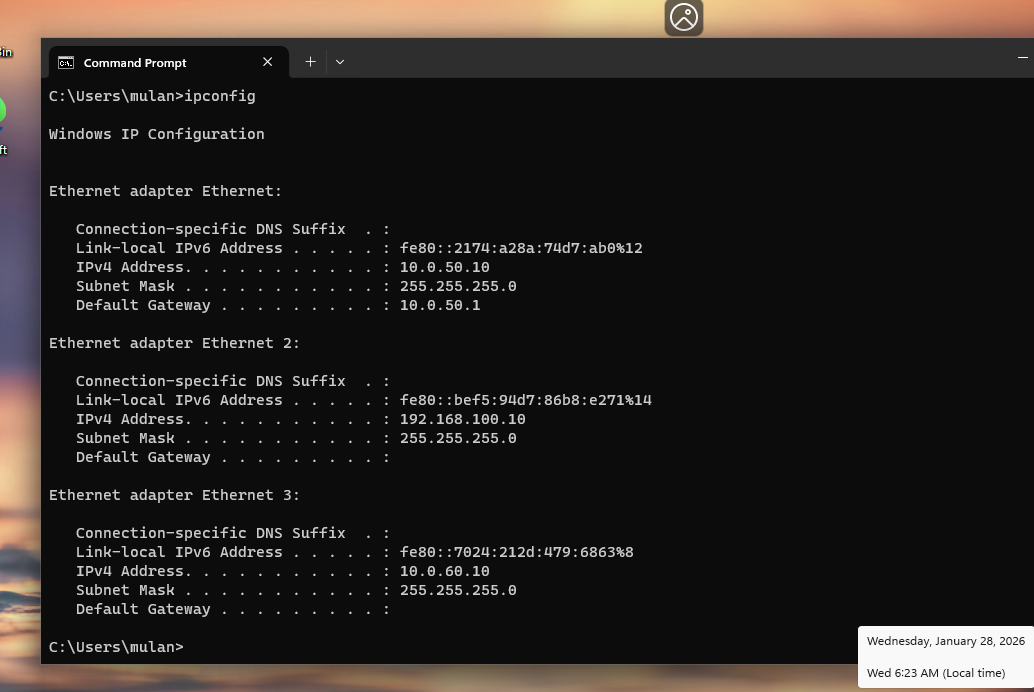
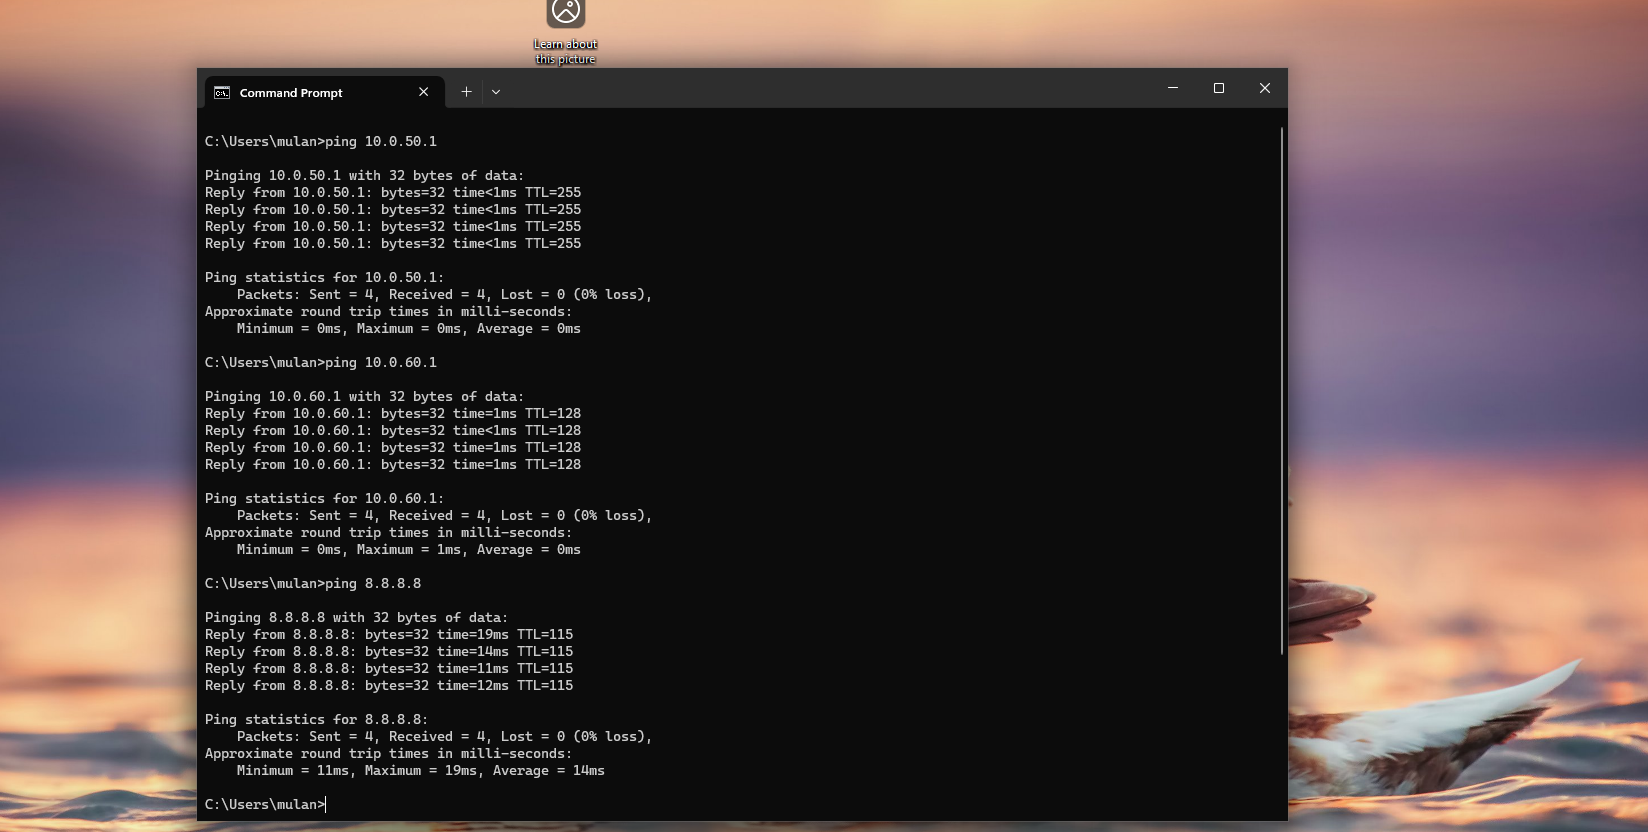
Step 2.5: Verifying Connectivity
1
ipconfig
1
2
3
ping 10.0.50.1
ping 10.0.60.1
ping 8.8.8.8
Next (Coming Up)
In the next section I will guide on:
- build the Ubuntu NDR VM
- explain promiscuous mode
- configure monitoring-only interfaces
- validate traffic capture with
tcpdump